Creating Video Captions
This guide provides steps for using Adobe Premiere Pro to add open captions to a social media video.
1. Download template files
To start, download the template files. This will automatically provide you with a Premiere project that has the preset caption styles included.
Download2. Open Premiere project
If you are using the downloaded template files, open the Premiere project file named Premiere Captioning Project.prproj.
3. Import video
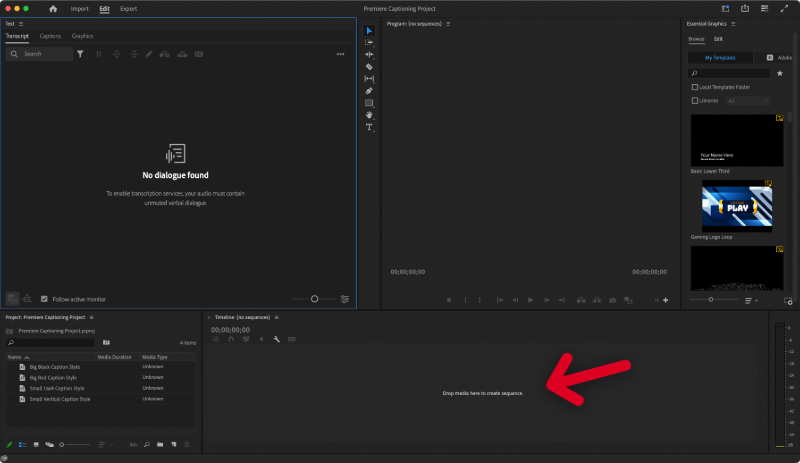
Import the video file you are going to create captions for. You can do this by dragging and dropping it onto the empty timeline at the bottom of your Premiere window.
4. Proofread and edit the transcript
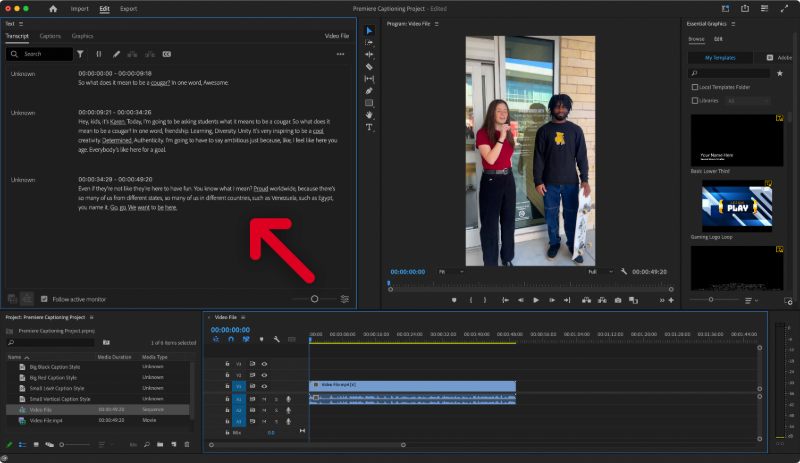
Upon importing the video file, Premiere will automatically begin to transcribe its dialogue. Once it’s done, the video’s transcript will appear in the upper left of the window. Play through the video and check for any errors. Make sure grammar and spelling are correct, as the automatic transcription is never perfect on its own. If you need to make a correction, double-click the words to enter edit mode. Once you’re done with that section of text, pressing escape on your keyboard will exit edit mode.
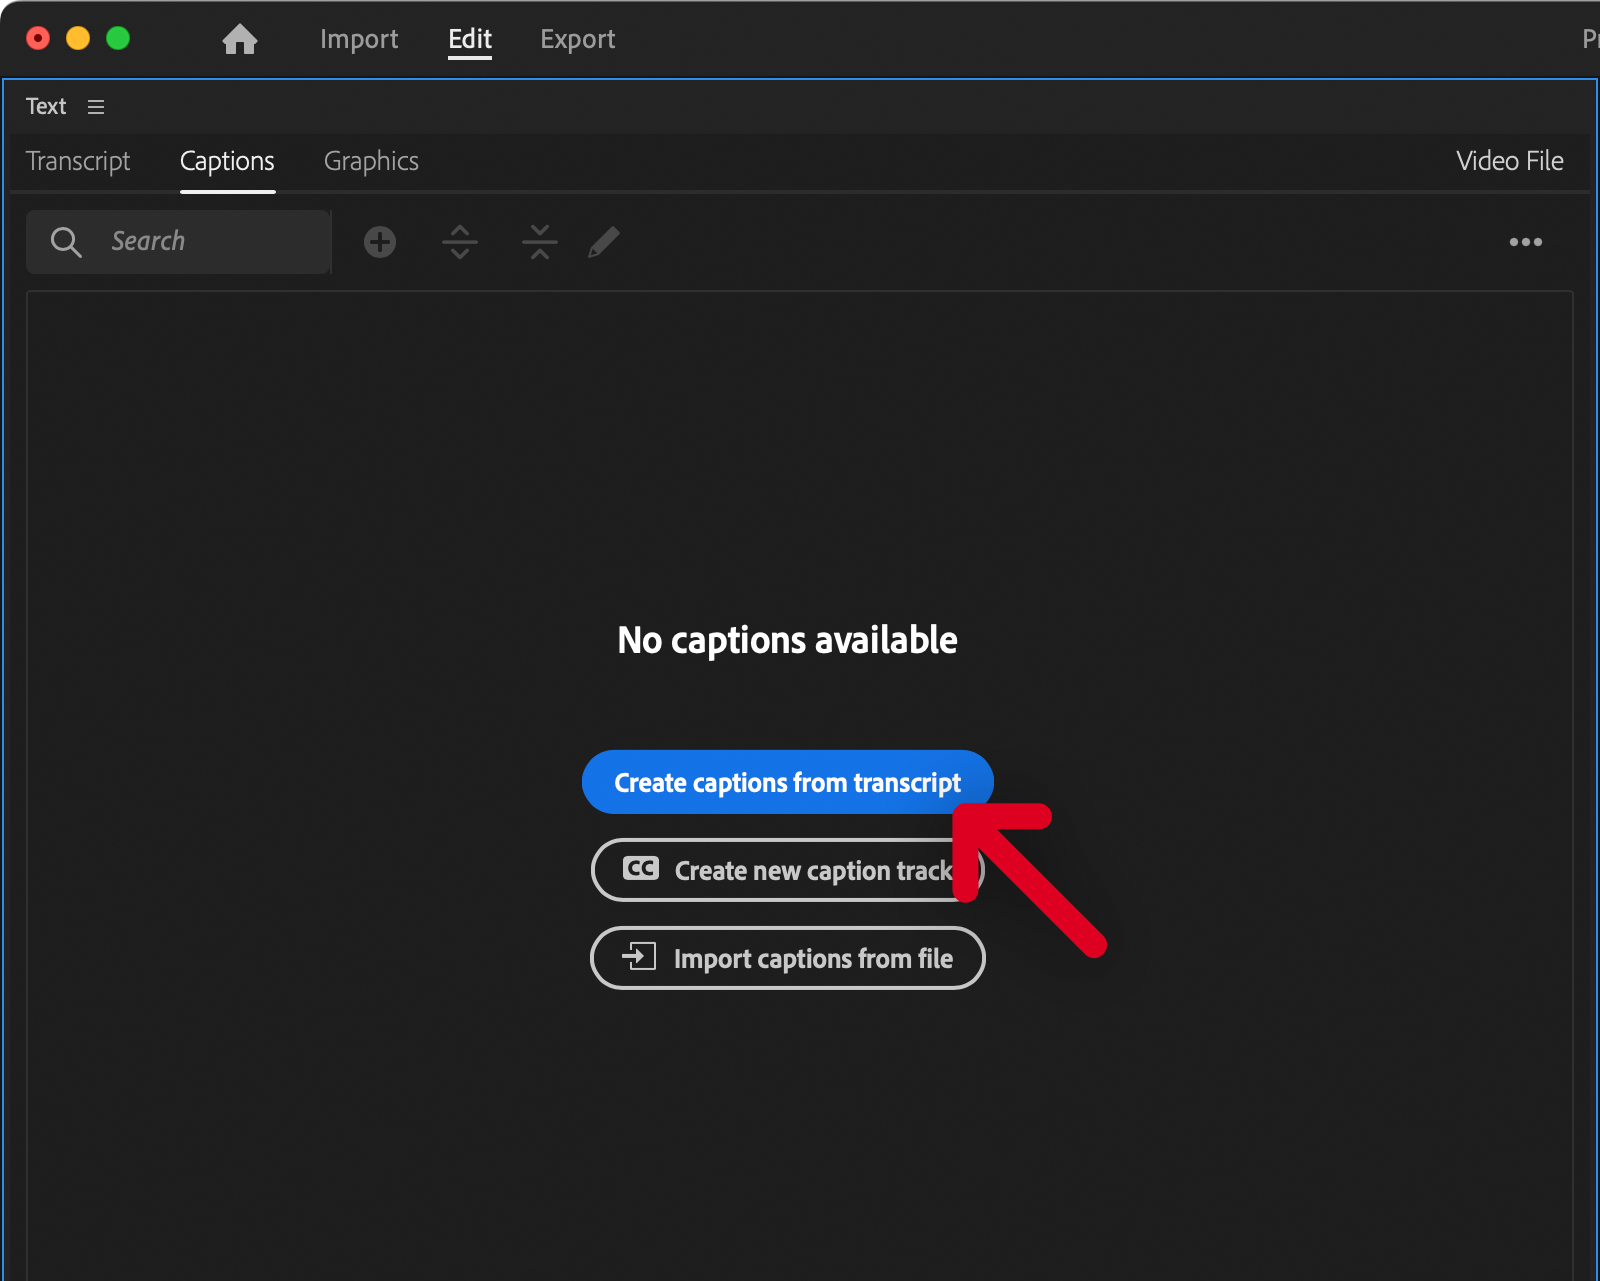
5. Create captions
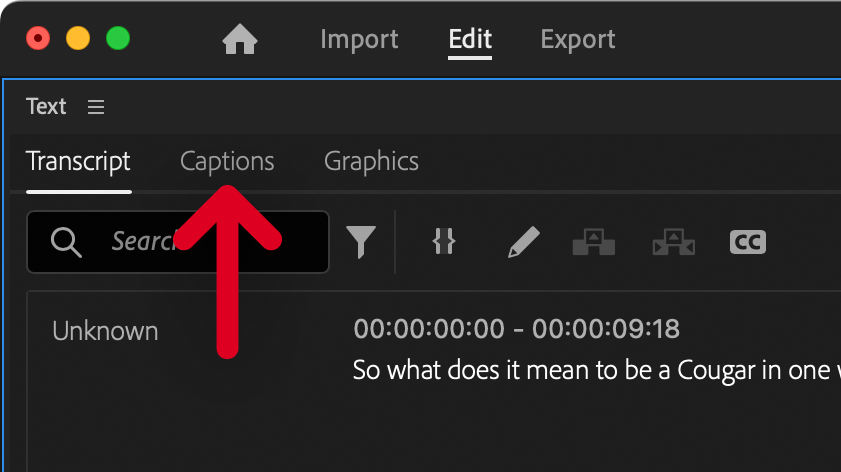
Once the transcript is edited to be completely accurate, switch from the Transcript section to the Captions section.
Then, click the blue button that says Create captions from transcript.
If you’re going to use any of the “big” caption styles, click the … button on the window that pops up and select Import preset. If you’re using any of the “small” caption styles, you can skip this part and continue here.
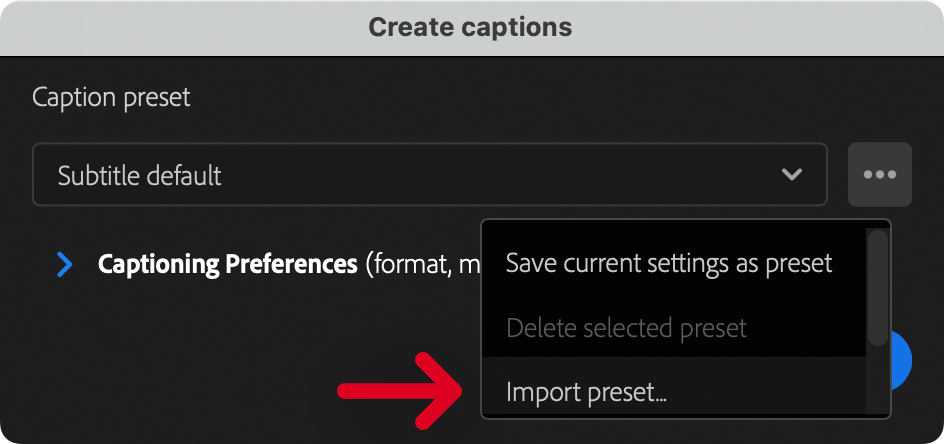
Using the file browsing window that comes up, choose the file named Big Caption Preset.prcaptionspreset (it was included in the folder that you downloaded in step 1).
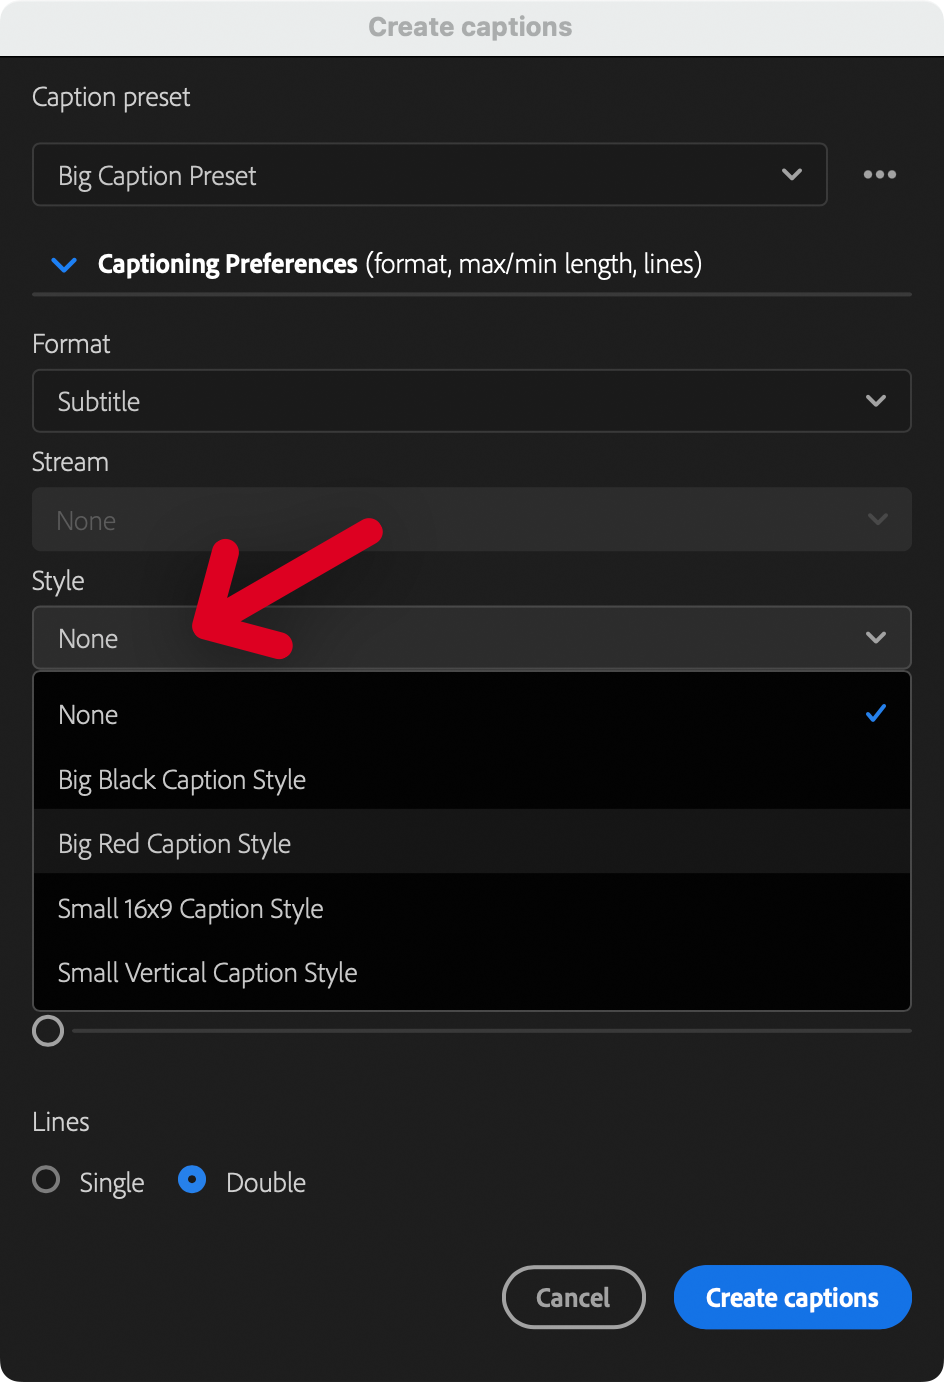
Next, open up the Caption Preferences section and change the style from None to the style of your preference. If you imported the Big Caption Preset.prcaptionspreset file in the previous step, choose one of the styles that are labeled as “big.”
You can then click the blue Create captions button.
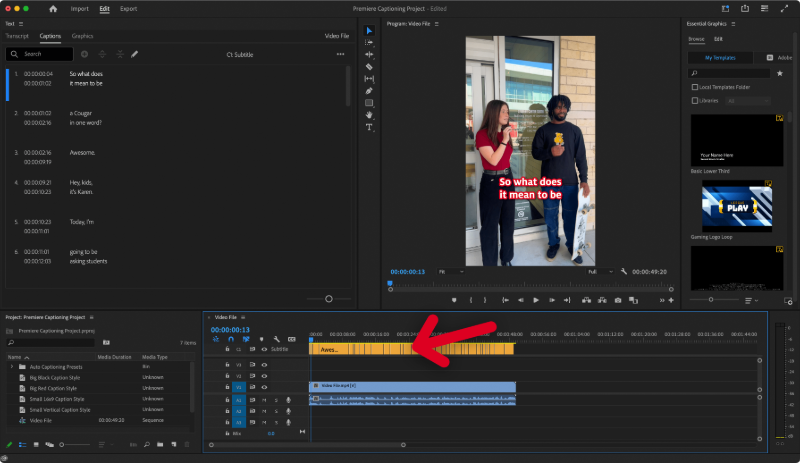
This will automatically cut up your transcript into captions that will appear throughout the video. The captions will show at the top of your timeline as orange-colored rectangles. Play through the video to make sure the captions are properly in sync with the spoken dialogue. The timing should be close, but some tweaks will likely be necessary. Also, look out for sentences that are broken up into separate captions in unnatural ways.
6. Export
Open Captions
If you want to export the video with open captions (meaning the stylized captions are “burned in” to the video file itself), just make sure the captions option is turned on during the export process and that Export Options is set to Burn Captions Into Video.

Closed Captions
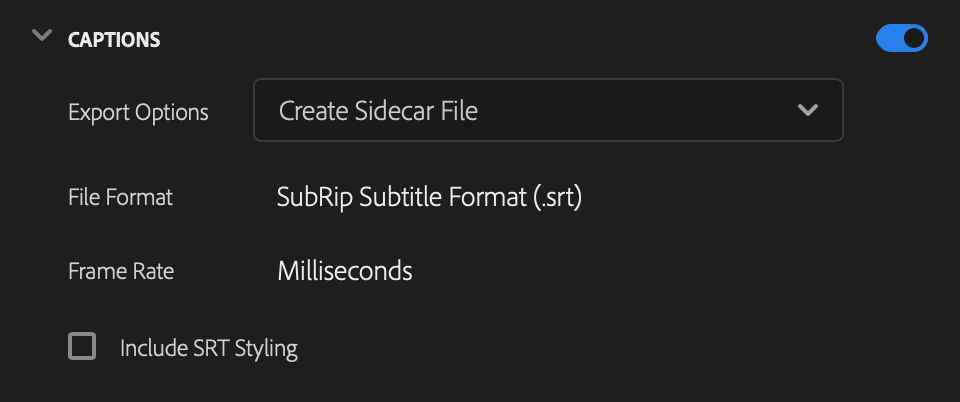
To export the video without stylized captions included, change the Export Options setting to Create Sidecar File. Upon export, your video won’t have the stylized captions built into it, but a second file (.srt file) will be available. This file can be imported into YouTube, Facebook, X or LinkedIn to more to allow the user to toggle captions on and off as they please. It’s recommended that the file name of the .srt file be the same as the video that it goes with, followed by .en_US.srt for captions that are in American English.