Getting Started
Creating Your Structure
- How to create a folder
- Landing Page Template FAQ | How to create a landing page
- Interior Page Template FAQ | How to create an interior page
Adding Core Content
- Inserting and editing links
- Getting started with Snippets, Assets, and Components
- How to insert a Snippet (with link to Snippets Guide)
- How to insert an Asset (with link to Assets Guide)
- How to insert a Component (with link to Components Guide)
Formatting & Advanced Editing
Creating a Folder
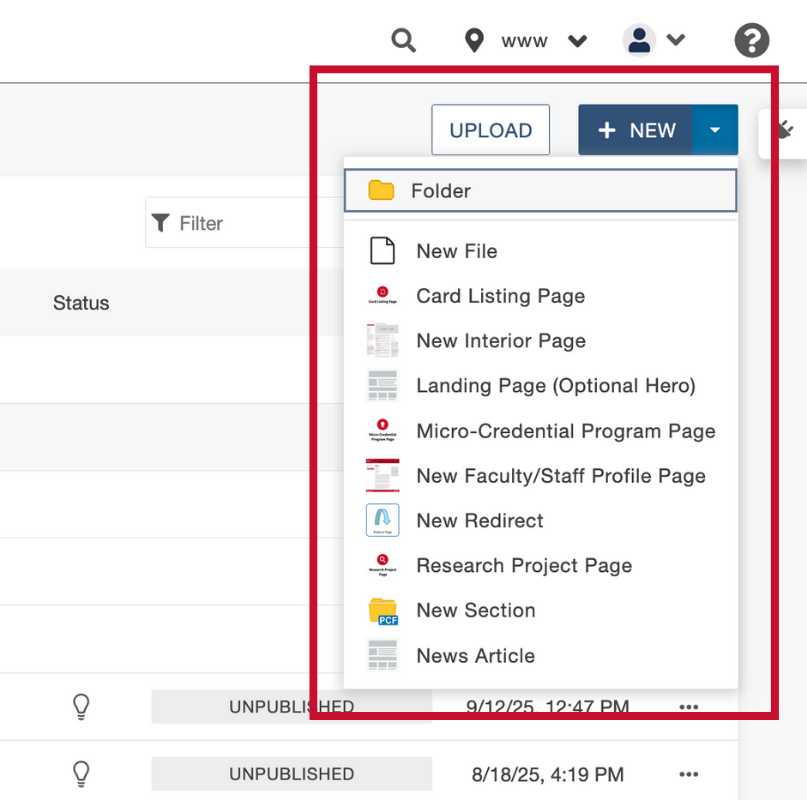
- From the Modern Campus Pages view, select the blue New dropdown menu in the top-right corner.

- From the dropdown menu, select Folder.
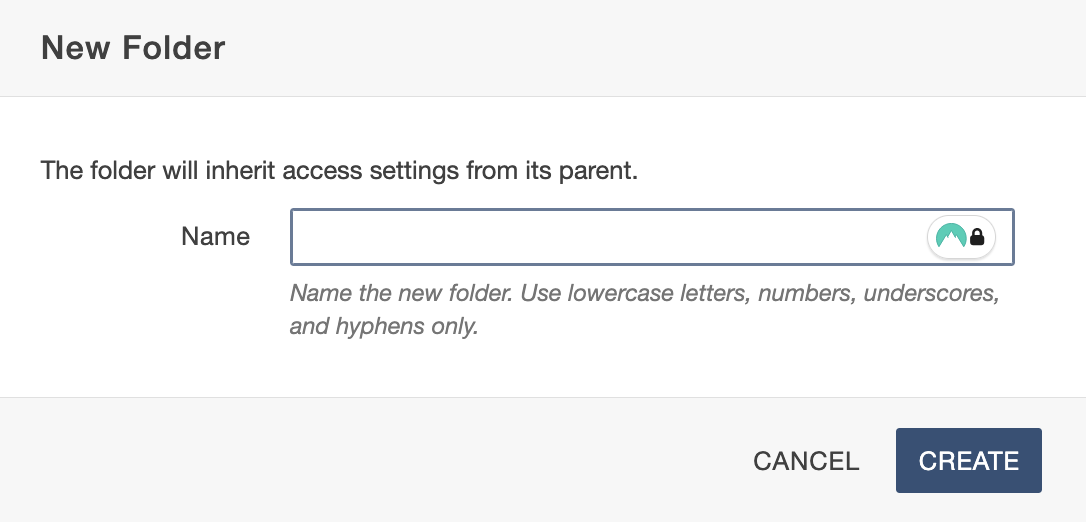
- Name your folder then click the blue Create button.
Creating a Landing Page
- Navigate to Content > Pages.
- In the top-right corner, click the blue +New button's dropdown arrow button.

- From the dropdown menu, select which page you'd like to create. (i.e., Landing page)

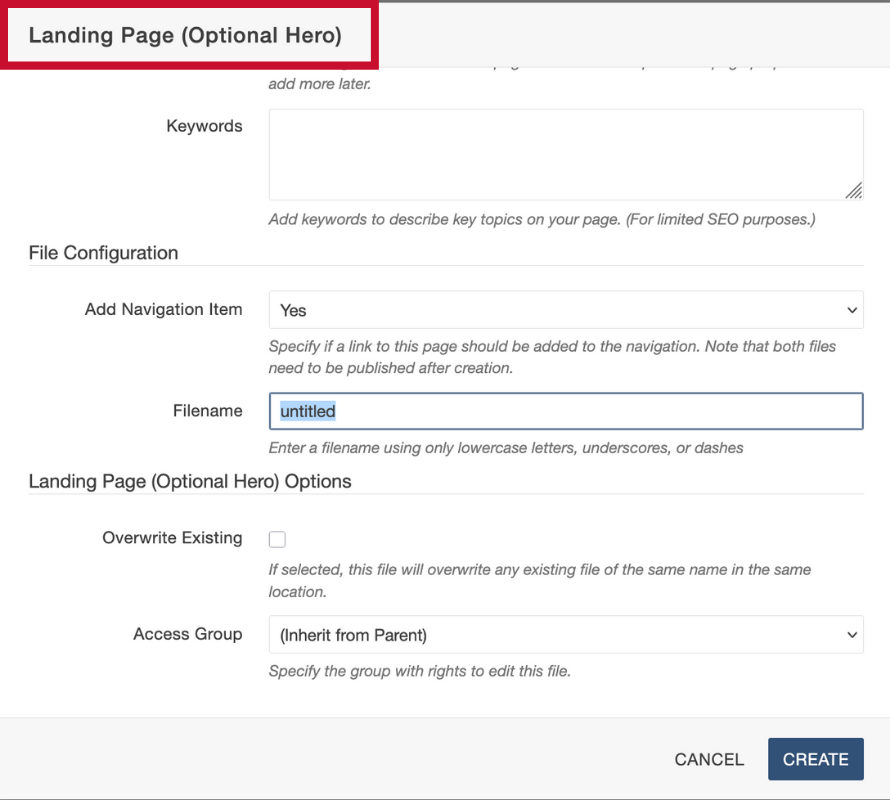
- Fill out the desired options. You can edit them later.
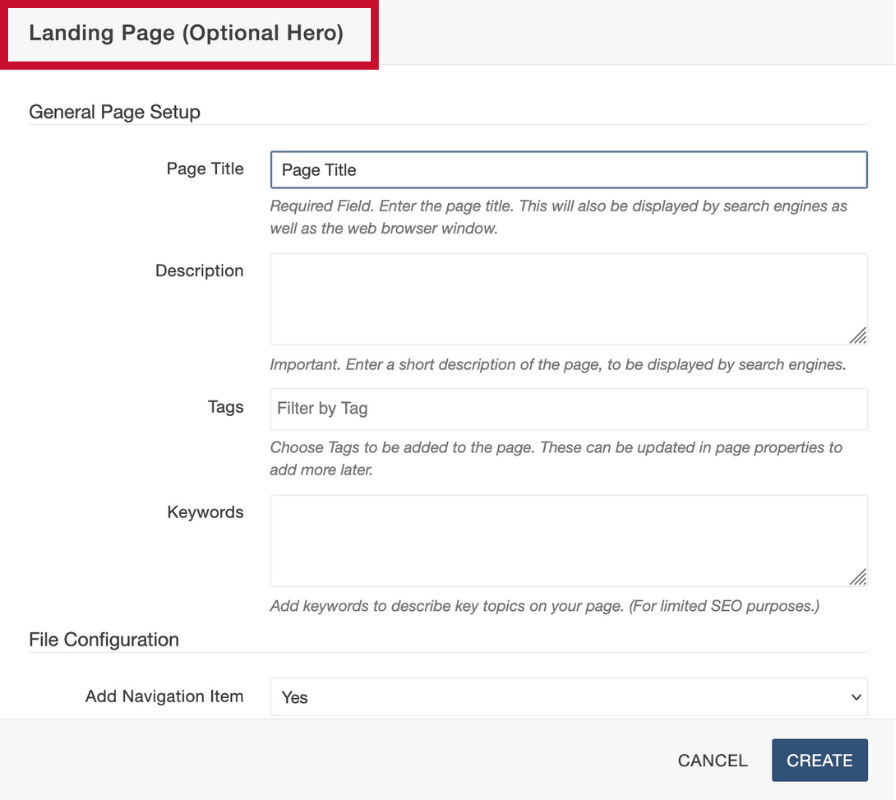
- When finished, click the blue Create button.
Creating an Interior Page
- Navigate to Content > Pages.
- In the top-right corner, click the blue New button's dropdown arrow button.
- From the dropdown menu, select which page you'd like to create. (i.e., Interior page)
- When finished, click the blueCreate button.
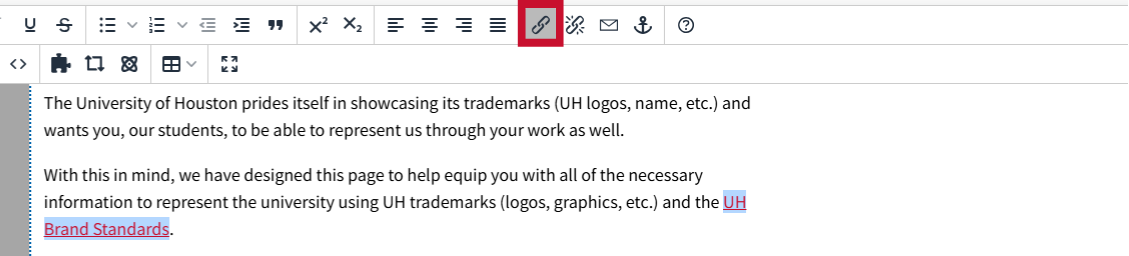
Inserting and Editing Links
Editing links:
- Click the text of the link you want to change.
- Select the chain link icon in the WYSIWYG toolbar.
In the Insert/Edit Link window:
- URLs: Enter the external web address or use the button on the right to select an internal page.
- Text to Display: Type the text that should appear for the link.
- Open Link in: Choose whether the link opens in the same window or a new one.
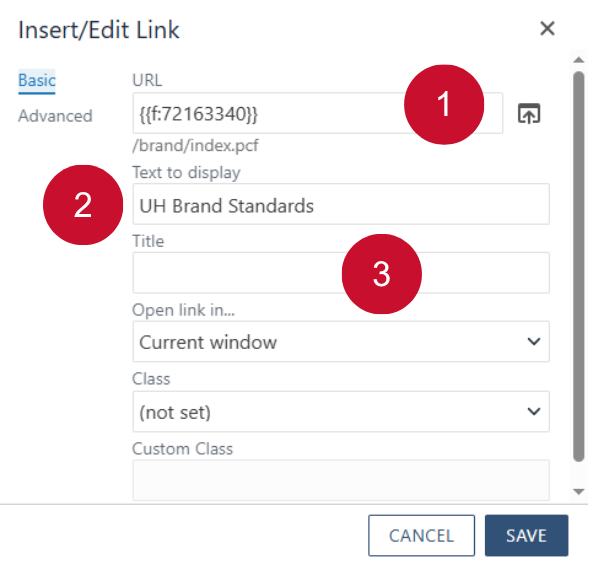
Click the blue Save button and your link is ready for use.
Getting Started with Snippets, Assets, and Components
![]()
As an editor in Modern Campus, you will encounter three core tools that will help you build and manage content on your department’s website: Snippets, Assets, and Components. Each tool serves a different purpose but works together to ensure consistency, accessibility, and efficiency across the university’s web presence. They are found in your WYSIWG toolbar in the Page Editor, and each tool provides various options to build out a webpage.
- Snippets

Pre-built content patterns you can drop into a page to maintain a consistent look and feel. Snippets make it easy to add items such as accordions, call to action boxes, buttons, or styled text without needing to write code. - Assets

Shared content that can be reused across multiple pages or sites. You are able to create Web Content and Plain Text Assets. Examples include news feeds, contact blocks, and policy statements. When an Asset is updated, the change appears everywhere that Asset is used—saving time and ensuring accuracy. - Components

Interactive tools within Modern Campus that gather user input or generate structured content. Components are often used for forms, dynamic listings, or more specialized page elements that require customization.
Because editors come from many different colleges, departments, and units, these tools provide a standardized way to create professional, accessible content while still allowing flexibility for your department’s unique needs.
To get started, explore the visual examples linked below and see how these elements look on both Interior pages and Landing pages as well as how to create them:
Getting Started with Snippets
Getting Started with Assets
Getting Started with Components
How to Insert a Snippet
Open the Snippet Tool: In Modern Campus, choose the page (a .pcf file) that you want to edit. In the Edit tab, click the green button of your choosing to begin editing. You can choose from "Left Sidebar Content", "Right Sidebar Content" or, most common, "Main Content" options. Locate the Snippet icon in the taskbar or WYSIWYG toolbar and click it.

(Optional) Select the Snippet Category: Click the Category drop-down arrow in the top-left corner of the Snippets tab and choose a Snippet category (ie: Interior). By default, all Snippet categories are selected making this step optional, but it is helpful in narrowing which Snippets to select from.
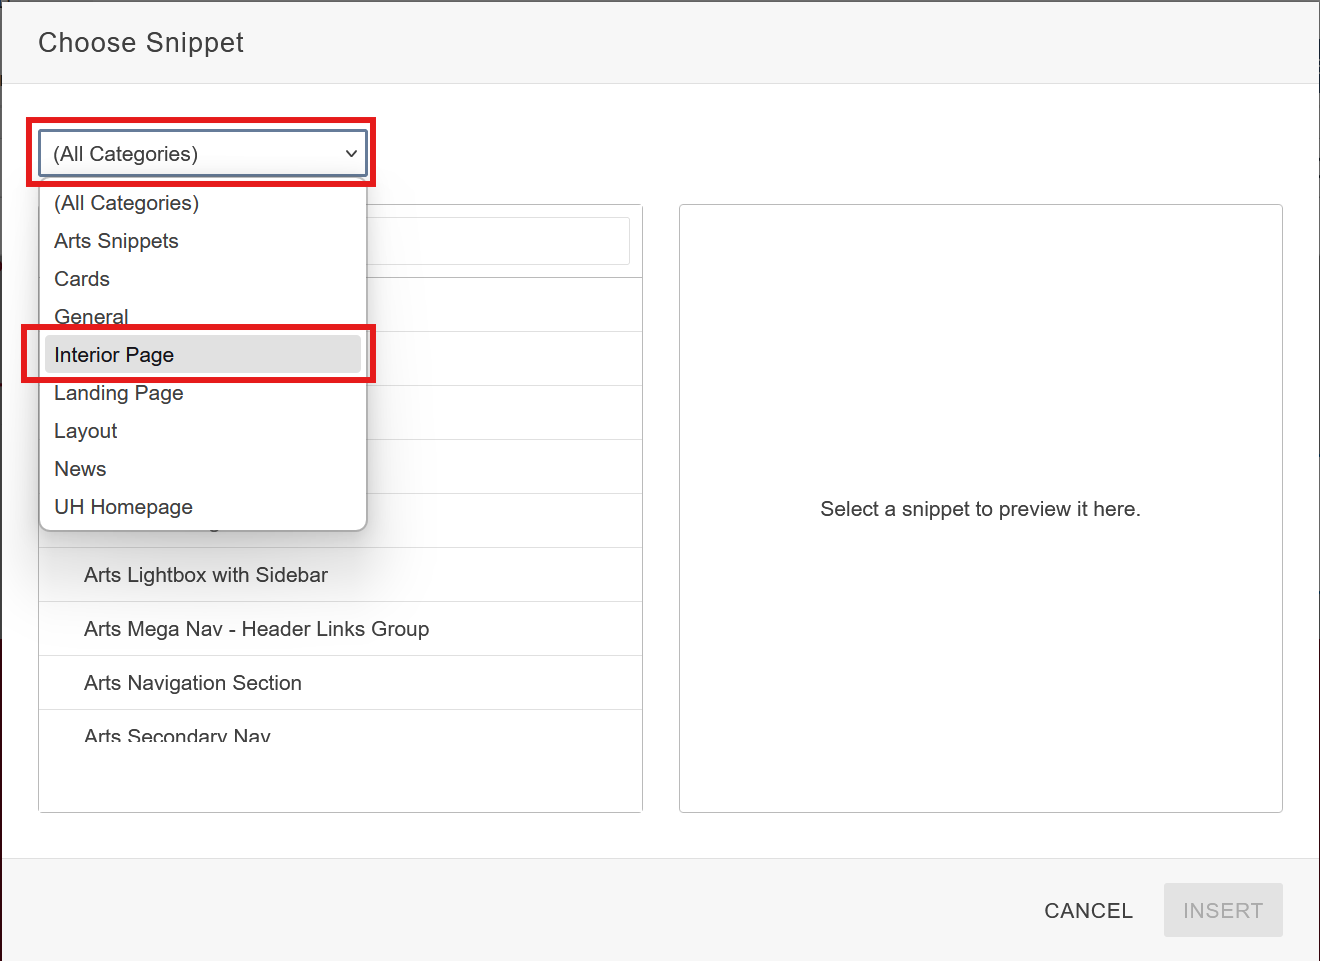
(Optional) Search Bar Filter: You may also use the search bar filter to search for a specific Snippet. This can be used with a category filter to further narrow down results.
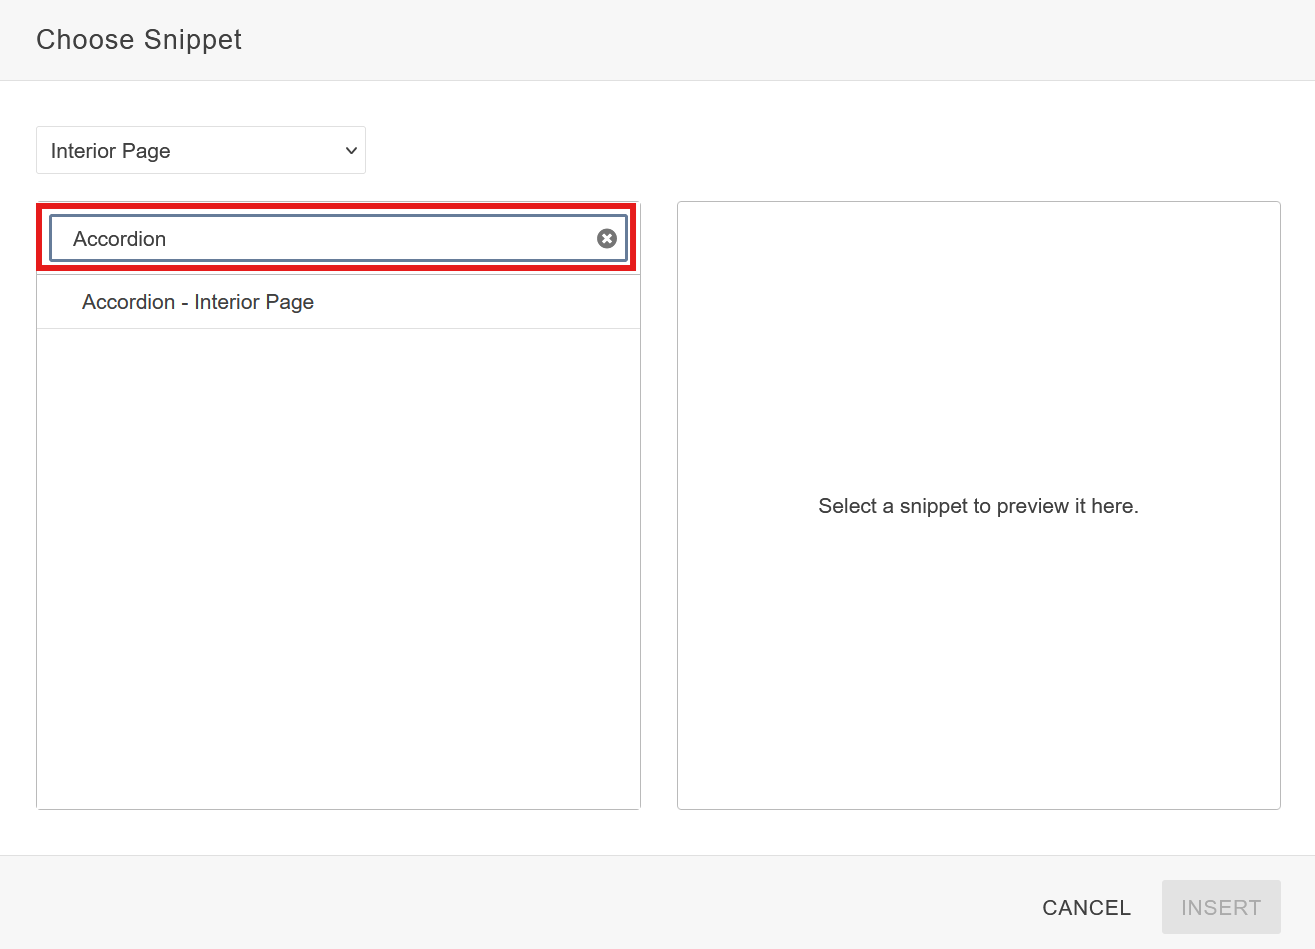
Insert Snippet: Once you have selected your Snippet, click the blue Insert button to drop it in.
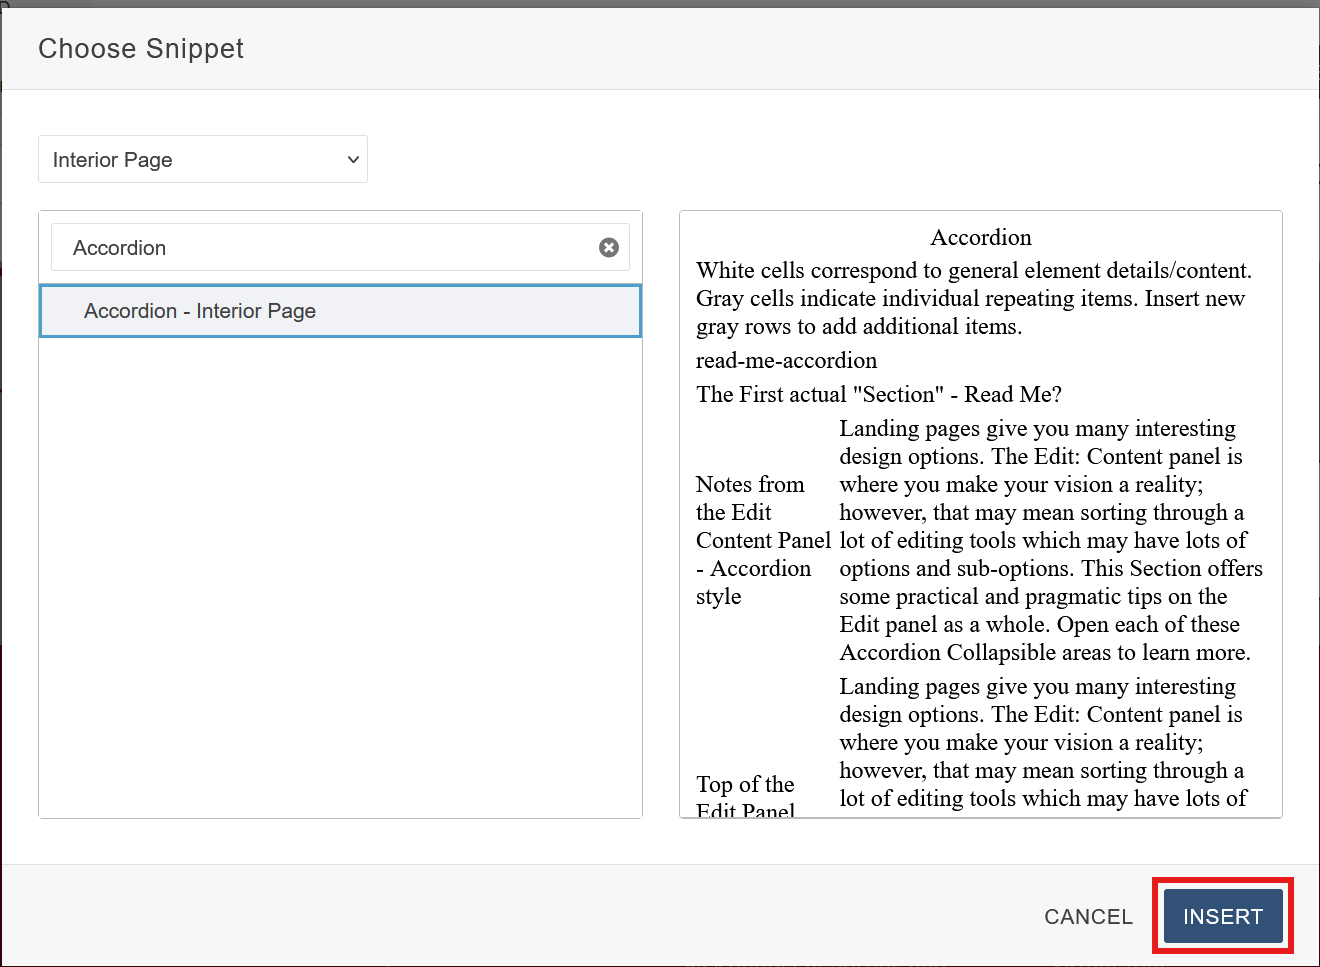
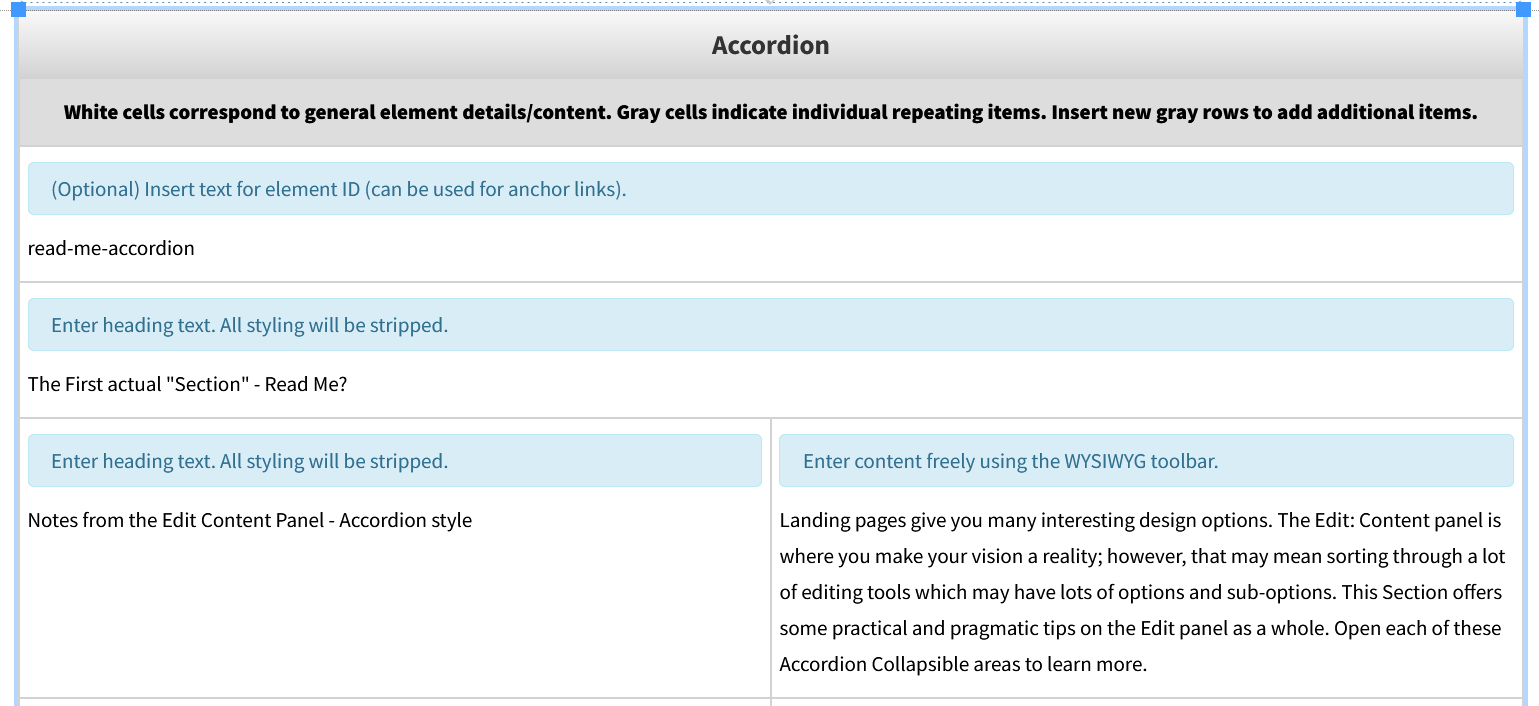
Once the Snippet is inserted, a table editor will pop up with each field playing a role in customizing the Snippet. Find out more information on how to use the table editor.
How to Insert an Asset
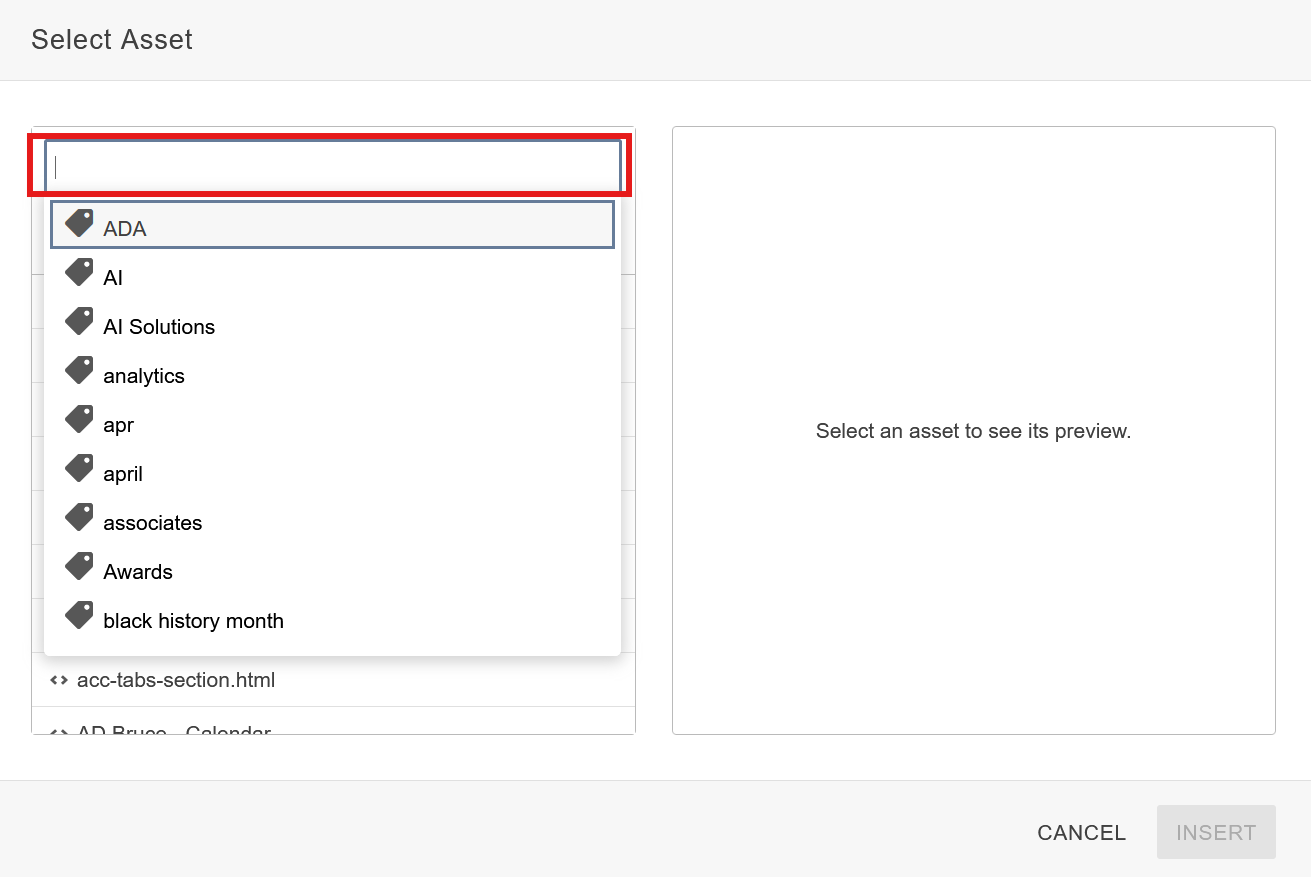
Open the Asset Tool: In Modern Campus, choose the page (a .pcf file) that you want to edit. Open the file. In the Edit tab, click the green button of your choosing to begin editing. You can choose from "Left Sidebar Content", "Right Sidebar Content" or, most common, "Main Content" options. Locate the Asset icon in the taskbar or WYSIWYG toolbar and click it.

(Optional) Select the Asset Tag: Click the Filter by Tag search bar and select one or more Asset tags to narrow down your search.
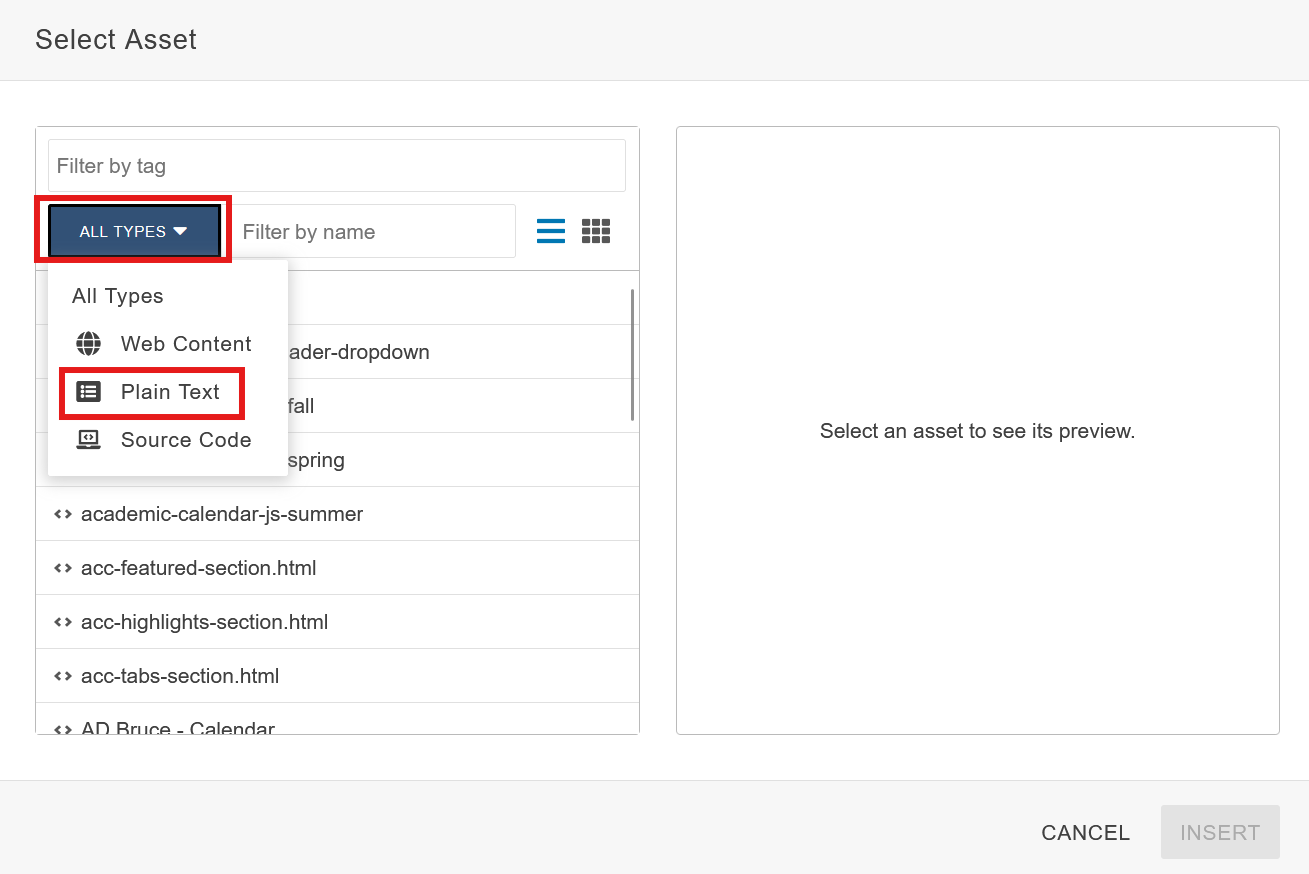
(Optional) Select the Asset Type: Click the Asset Type drop-down arrow in the top-left corner of the Assets tab and choose an Asset type (ie: Plain Text or Web Content). By default, all asset categories are selected. This step is optional, but it is helpful in narrowing down which Assets to select from.
(Optional) Search Bar Filter: You may also use the search bar filter to search for a specific Asset. Click the Filter by Tag search bar and select one or more Asset tags to narrow down your search.
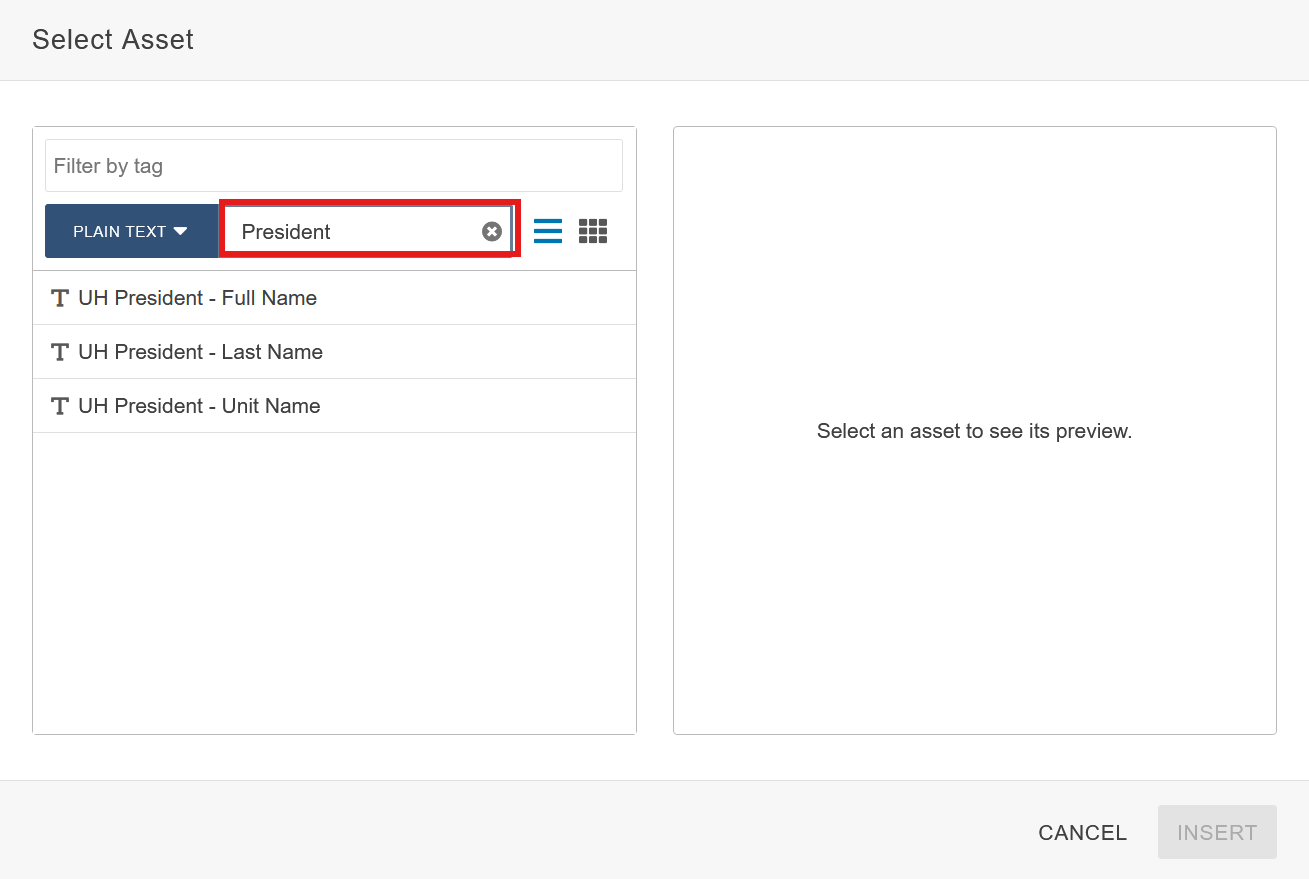
Insert Asset: Once you have selected your Asset, click the blue Insert button to drop it in.
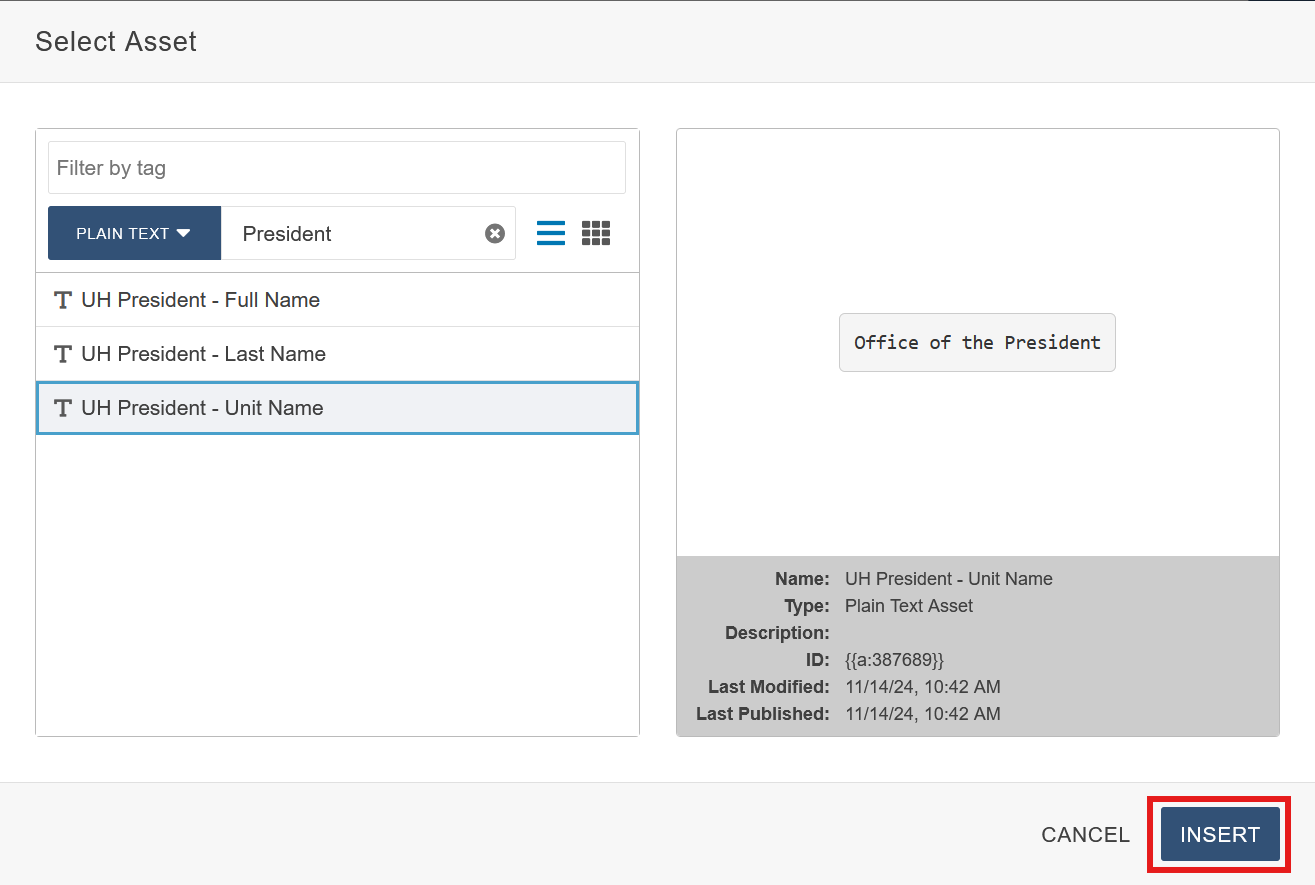
Once the Asset is inserted, it cannot be edited or modified in any way shape or form within the Editor.
You must edit Assets by going to Content > Assets and searching for your asset, selecting it, checking it in via the lightbulb and editing it there (assuming you have access to Asset edit features).
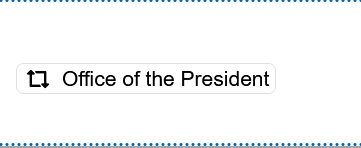
The actual Asset is not viewable in the editing window; it just shows the name of the Asset as shown below.
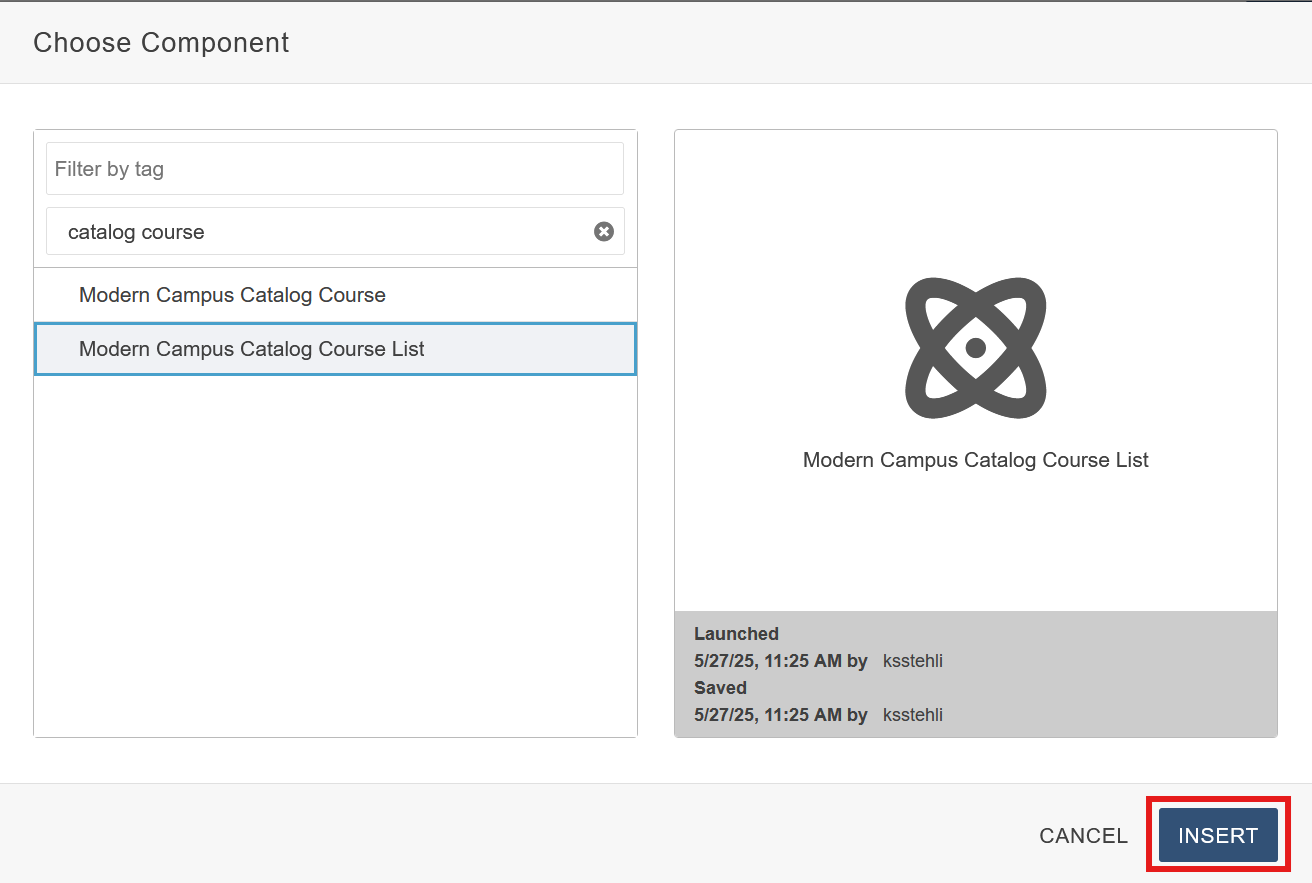
How to Insert a Component
Open the Component Tool: In Modern Campus, choose the page (a .pcf file) that you want to edit. In the Edit tab, click the green "Main Content" button. Locate the Component icon in the taskbar or WYSIWYG toolbar and click it.

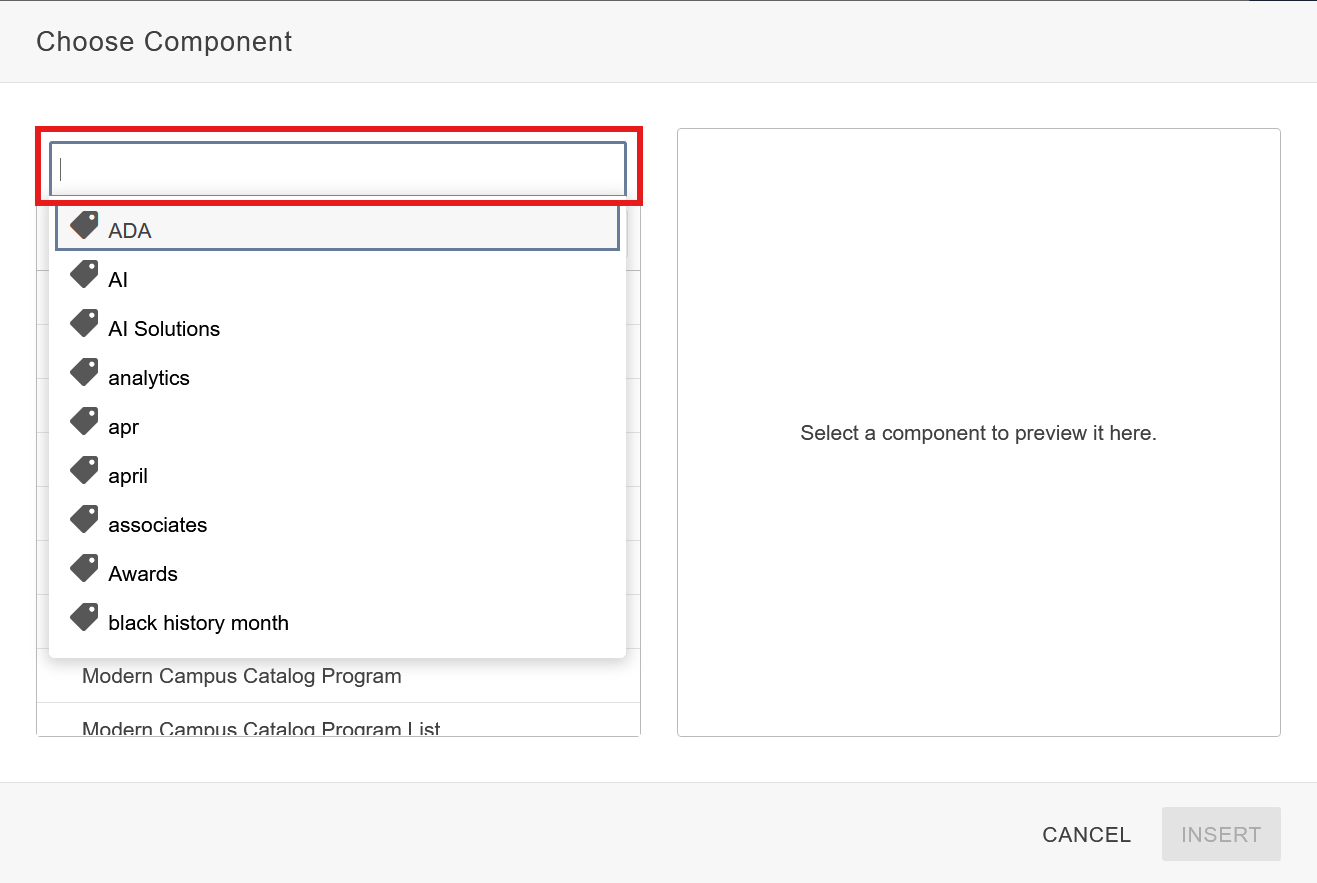
(Optional) Select the Component Tag: Click the Filter By Tag search bar of and choose one or more Component tags to choose from to help with narrowing your search.
Insert Component: Once you have selected your Component, click the blue Insert button to drop it in.
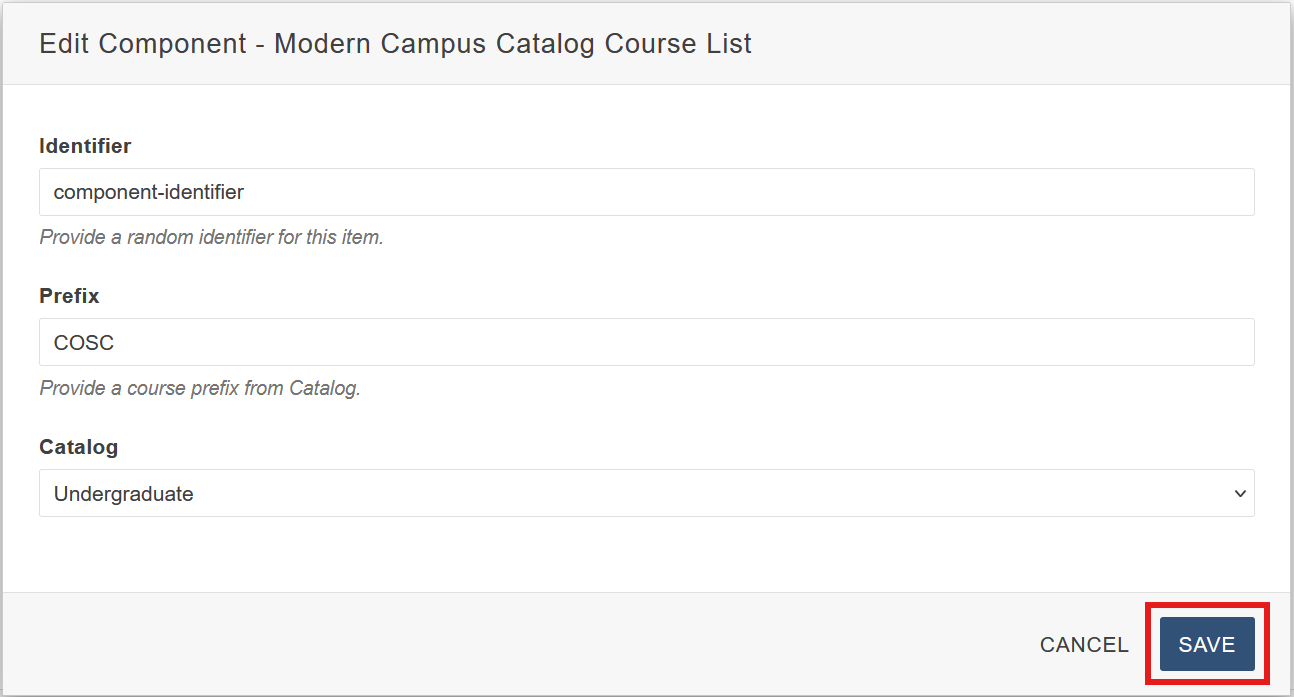
Component Form: Before the Component is dropped it, a form will pop up for the user to fill in. Each Component will have its own form specific to that Component. Once all required fields are filled in, click the blue Save button to drop the Component in.
Once the Component is dropped in, the actual content of the Component will not be visible within the editing window. To make any modifications to the Components form fields, click the Component in the editor and select the pencil icon to make edits.

You may also click the gray X icon to delete the Component entirely.
Snippet Table Editor Guide
Table editors offer a user-friendly way to customize and configure settings without writing a single line of code. While some Snippets are straightforward and work out of the box, others are more complex and require a deeper understanding of how to modify the table editor to fully unlock their potential.
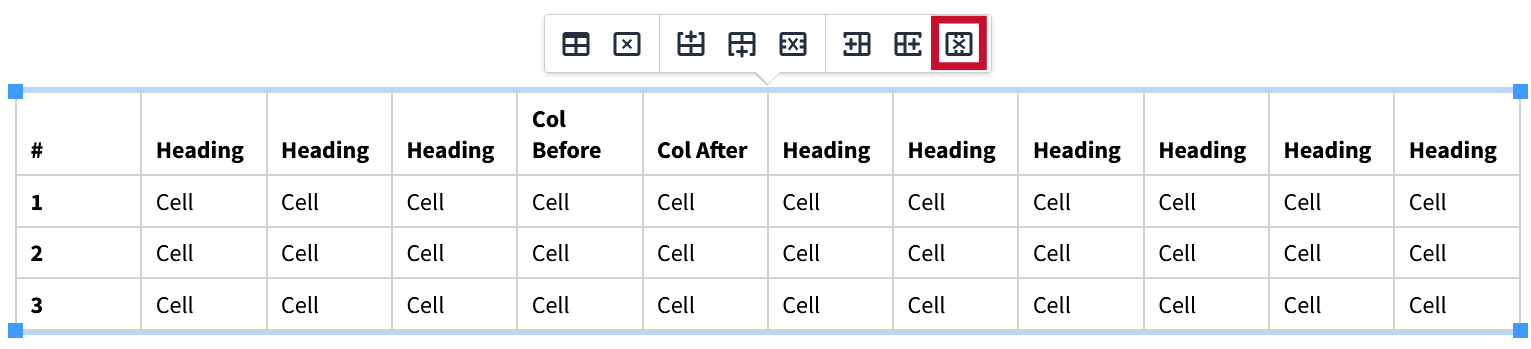
There are 8 different options to interact with the table editor. To view them, click inside any table editor and the following buttons will pop up:
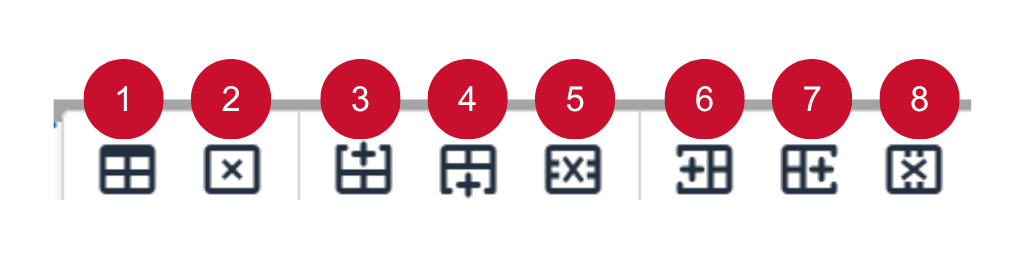
Here are brief descriptions of each button from left to right:
- Table Properties: Choose attributes such as: Width, Height, Striped, Bordered, Caption, etc.
- Delete Table: Delete the entire table.
- Insert Row Before: Adds a new row to the top of the selected row.
- Insert Row After: Adds a new row to the bottom of the selected row.
- Delete Row: Delete the entire selected row.
- Insert Column Before: Adds a new column to the left of the selected column.
- Insert Column After: Adds a new column to the right of the selected column.
- Delete Column: Delete the entire selected column.
Rows:
Many Snippets require adding rows to make full utilization of their features. Inserting new rows inside the table editor is helpful to add new content to the Snippet, without having to recreate the Snippet table editor.
Although Modern Campus uses the term “insert,” a more accurate description in the case of rows would be “duplicate.” When you insert a row in the table editor, it duplicates the structure of the currently selected field (or row). The new row—whether inserted above or below—mirrors the layout and field types of the selected one, allowing for consistent formatting and easier data entry. This behavior ensures that the inserted row aligns with the table's existing structure without requiring manual configuration.
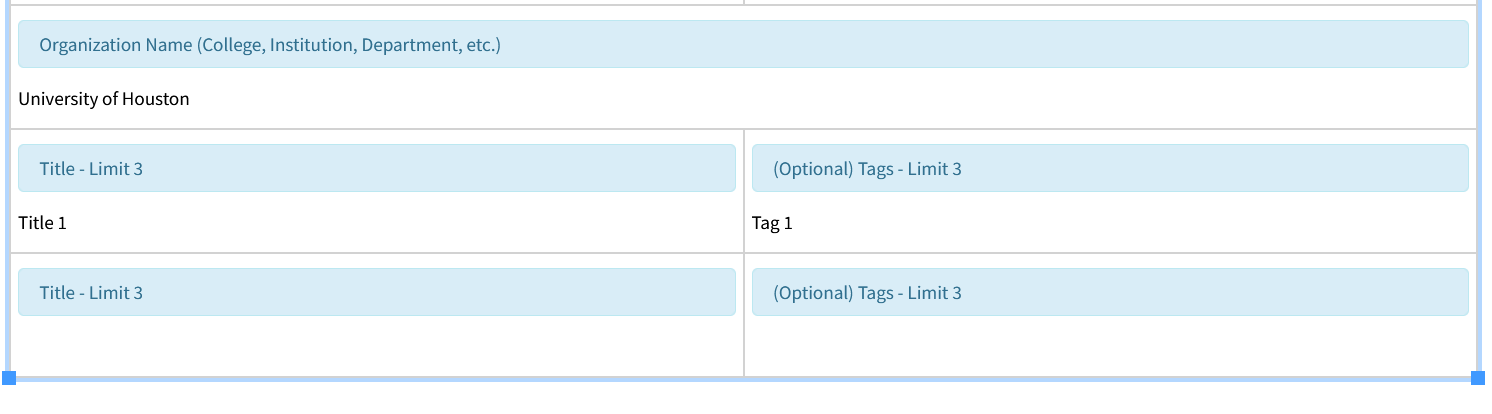
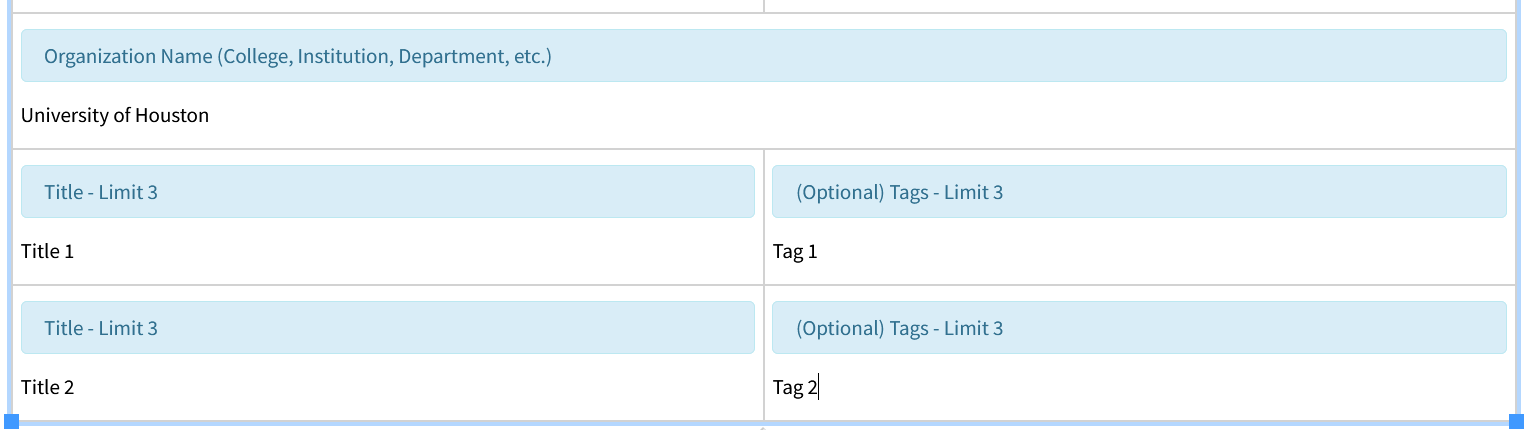
Below is an example of using rows inside the table editor with the Card – People Snippet:
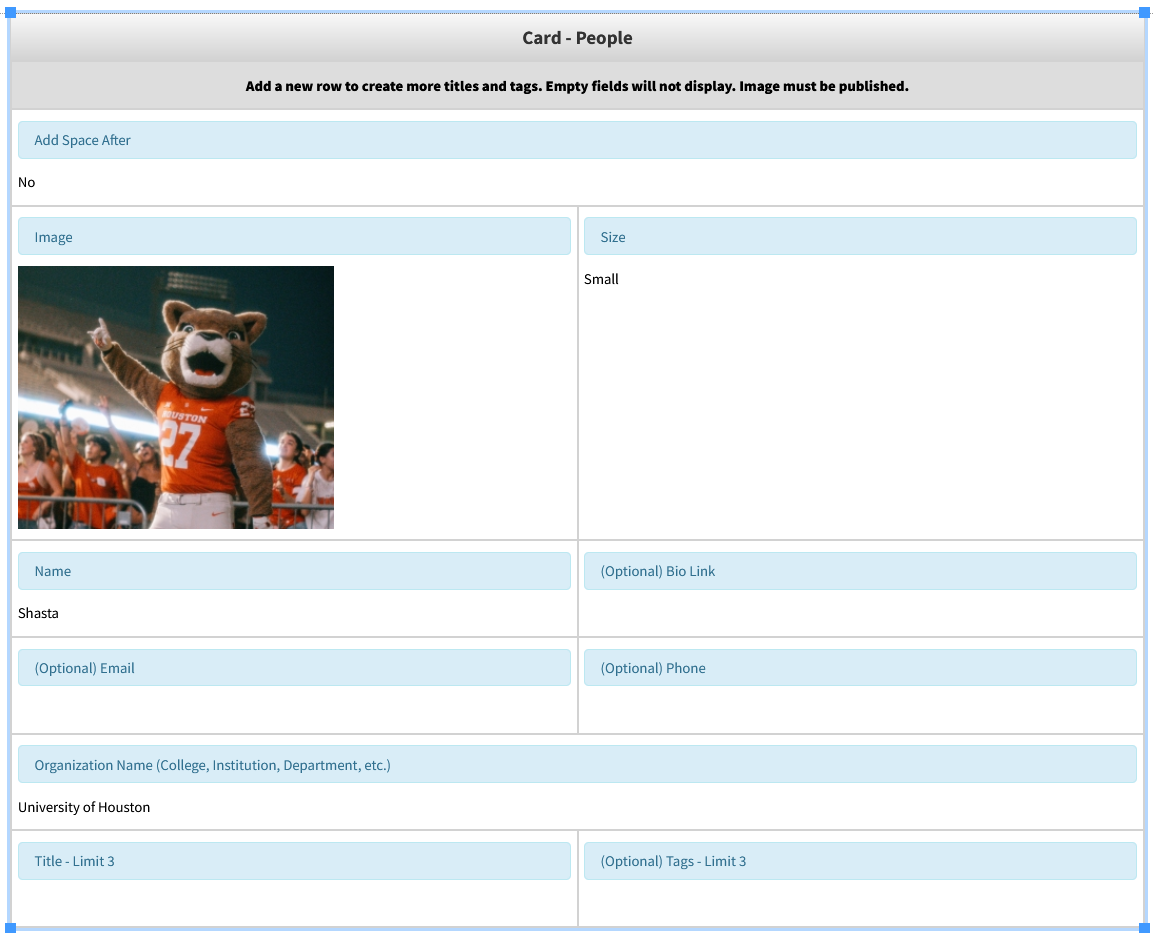
One of the features of this Snippet is the ability to add titles and tags associated with any given person. By default there is only one row in the table editor to add titles and tags, even though up to 3 are supported.
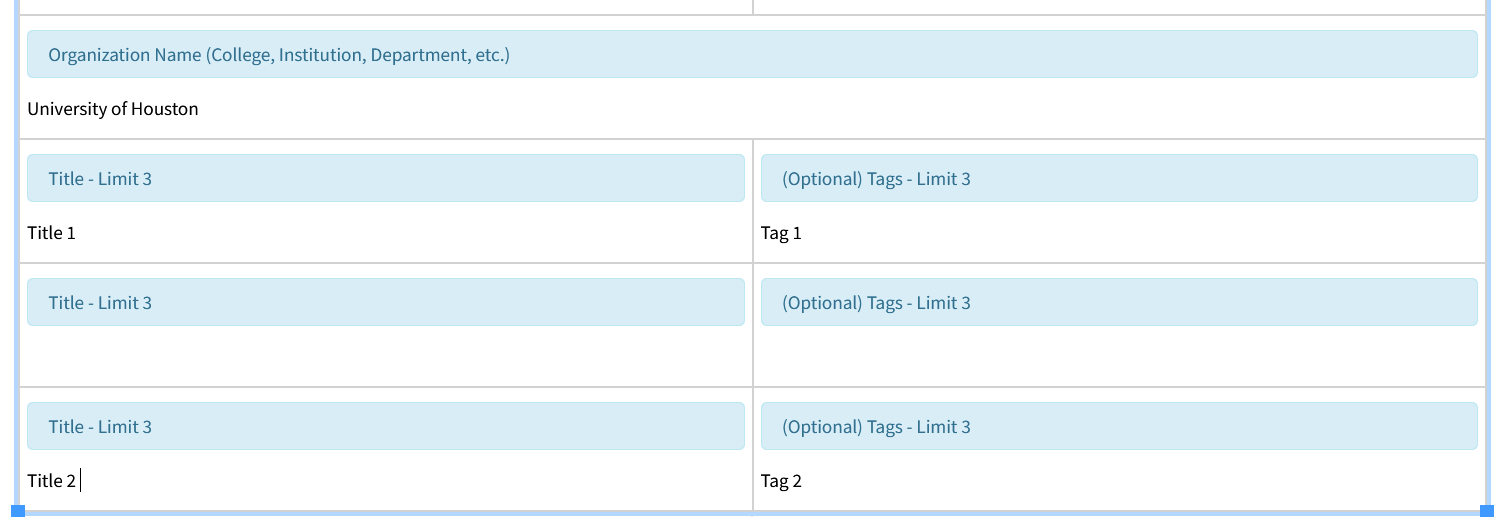
We now have three instances of Titles and Tags added to our people card.
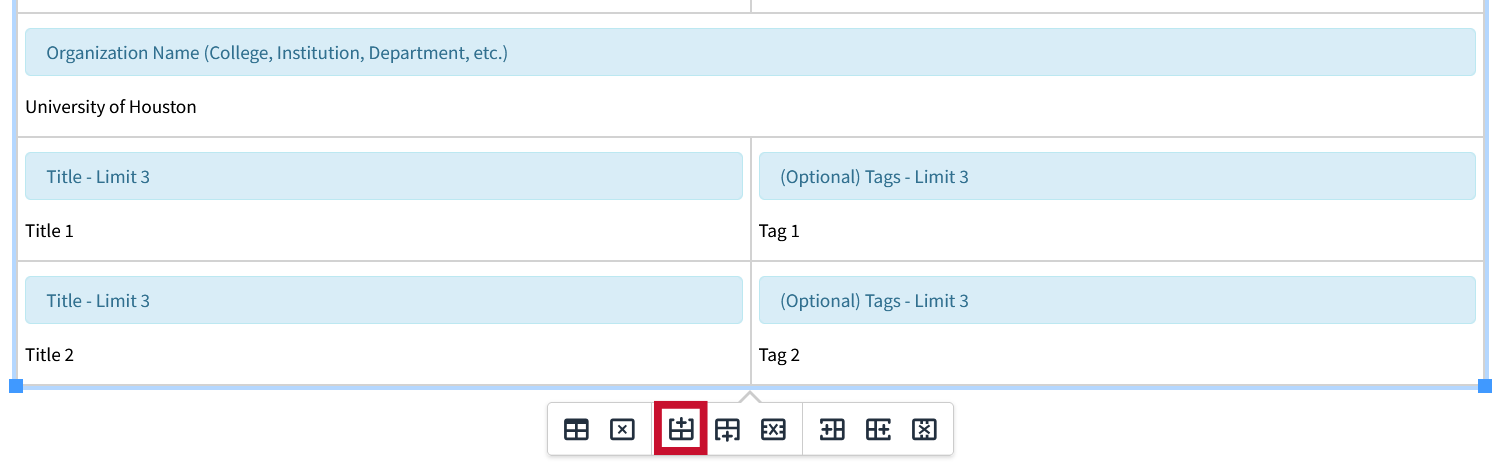
Insert Row After:
Select the row which we want to add another instance of and click the “Insert Row After” button. This will insert a duplicated instance below the selected row.
In this instance we would select the last row, which is the one with the Title and Tag fields, since we would like additional instances of each.

Insert Row Before:
To insert a new row before an existing one, first select the row you'd like to duplicate. Then, click the "Insert Row Before" button. This will insert a duplicated instance above the selected row.
In this instance we have selected the bottom most row.
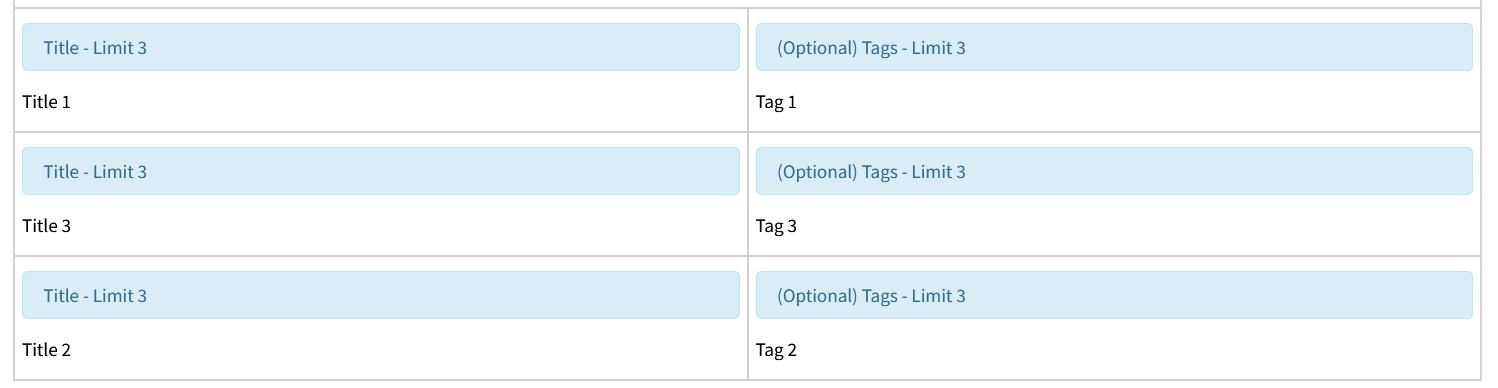
We now have three instances of Titles, and Tags added to our people card.
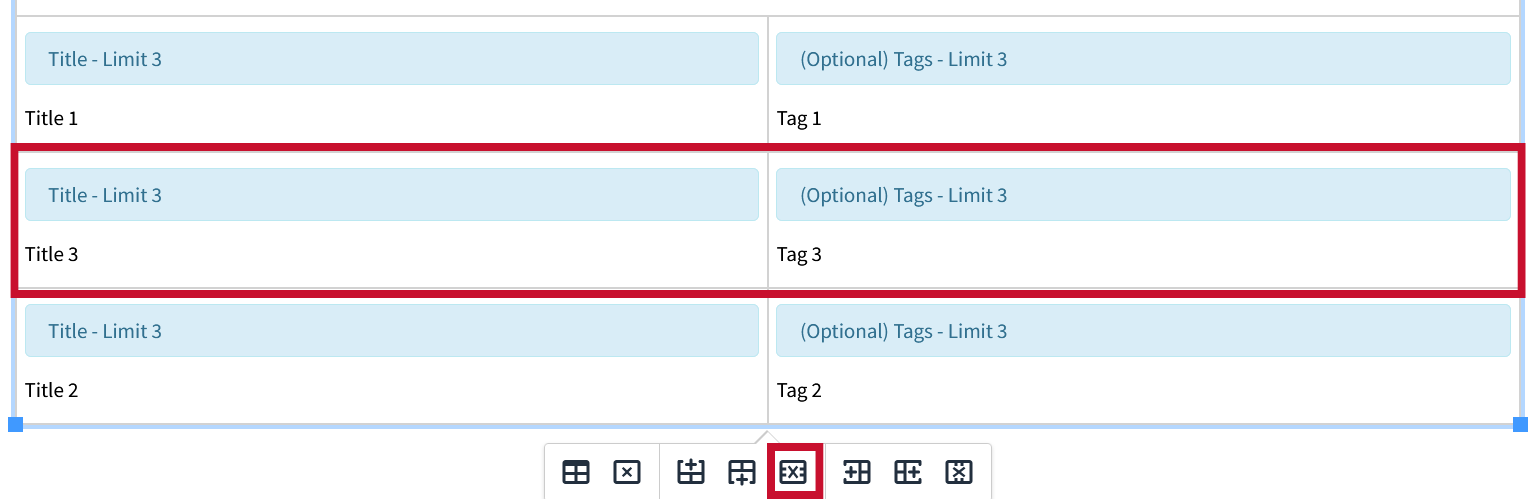
Delete Row:
To delete a row, select the row that you would like removed, and click the “Delete Row" button.
In this instance, we have selected the middle row.
Columns
Understanding how columns work in the Snippet table editor gives you greater control, allowing you to get the most out of any Snippet that involves adding columns.
Below is an example of using columns inside the table editor with the Responsive Table Snippet:

One of the features of this Snippet is the ability to add or remove columns as you would with a typical table in something like Word.
There is no limit to the number of columns or rows that can be added to the responsive table, but by default there are 10 columns and 3 rows.
Lets add 2 columns to our table:
Insert Column After:
Select the column for which you would like to add a new one to the right of and click the “Insert Column After” button.
In this instance we have selected the fourth column.


Insert Column Before:
To insert a column to the left of one, simply select the column you would like to add a new one to the left of and click the “Insert Column Before” button.
In this instance we have selected the newly added fourth column.


Deleting Columns:
To delete a column, select the row that you would like removed, and click the “Delete Column" button.
In this instance we have selected the "inserted after" column to delete.

Newsroom Interface
(Instructions coming soon...)