LiveWhale Calendar Guide
Table of Contents
- Logging In
- Accessing the Events Calendar
- Adding an Event to the Calendar
- Adding Event Details
- Sharing and Privacy
- RSVP Details
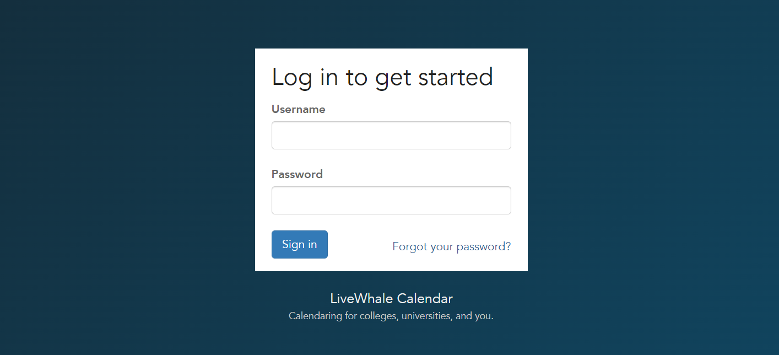
Logging In
- UH LiveWhale Calendar link: https://calendar.uh.edu/livewhale
- Enter your login credentials
- If you are unable to remember your password, click the “Forgot your password?” link and you will be directed to a new page to reset your password.
Accessing the Events Calendar
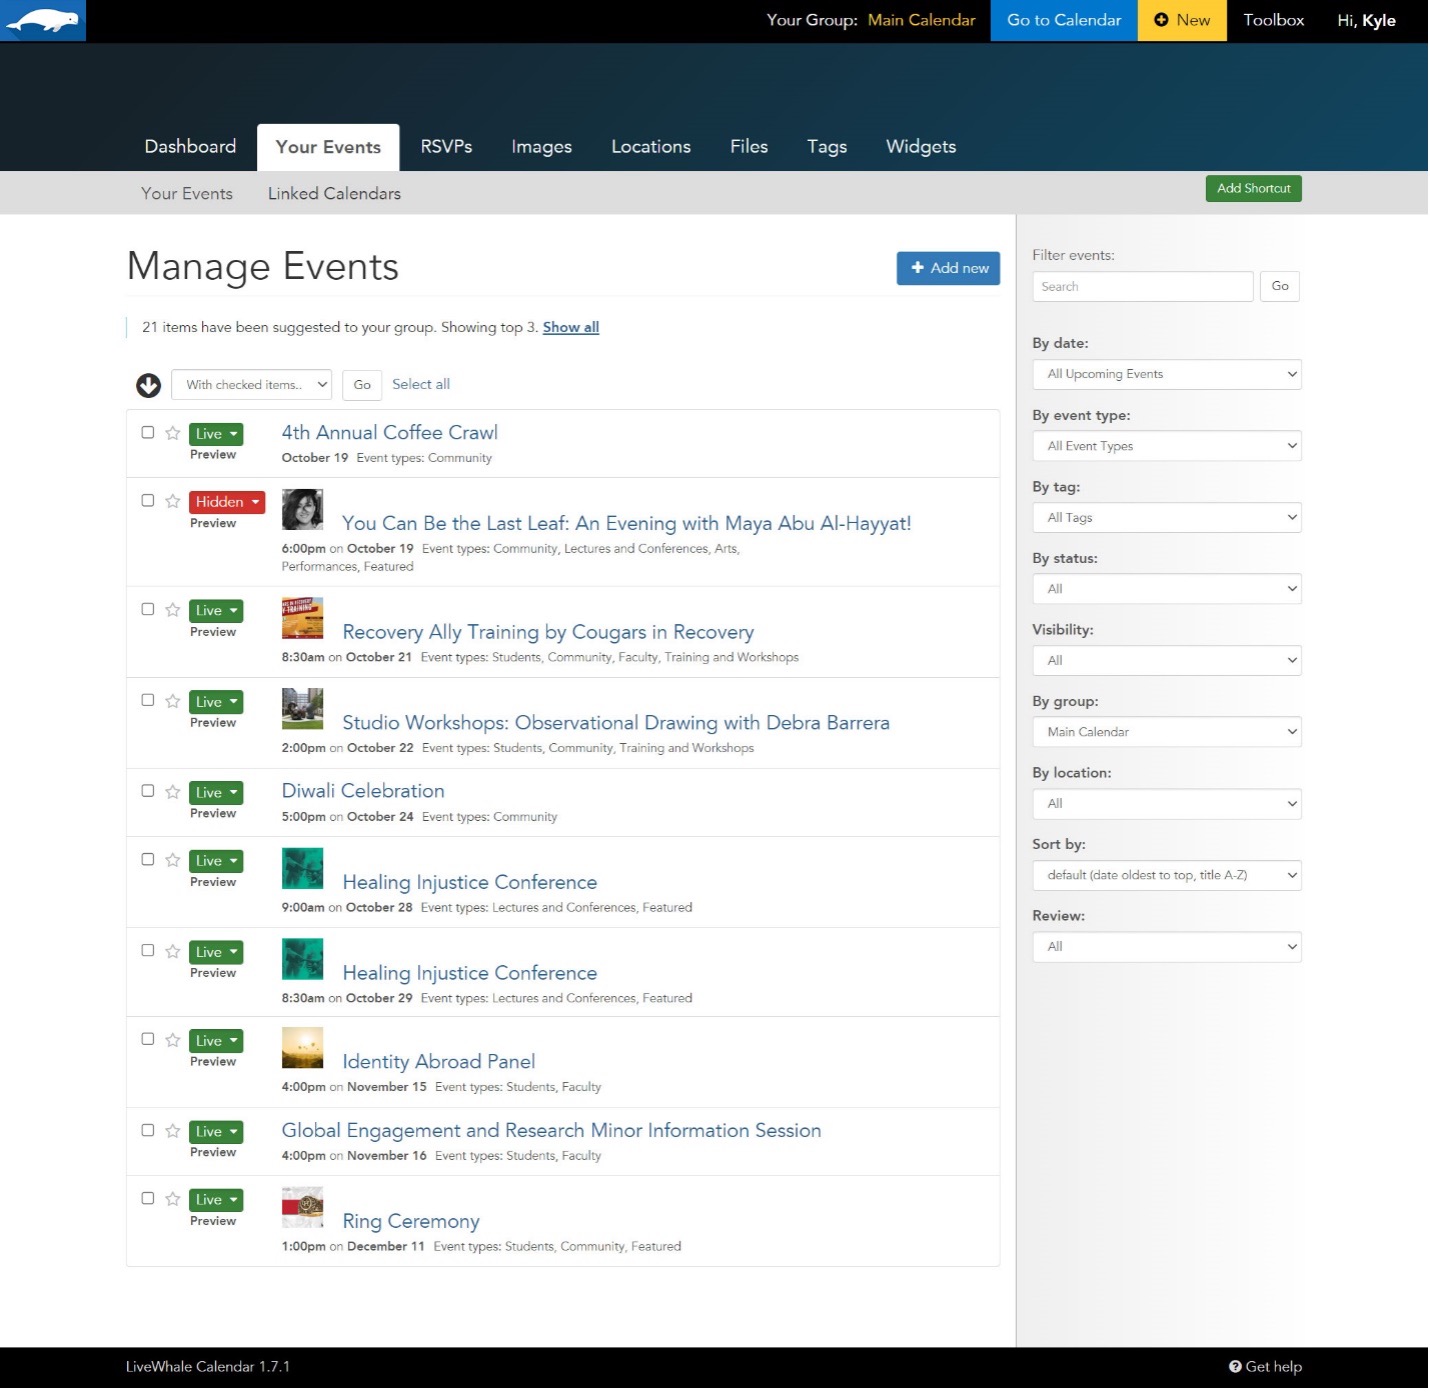
Once you are logged in, you will be directed to the Events Calendar where you can view, add, delete, and modify events.
This image shows an example of the event management dashboard.
Adding an Event to the Calendar
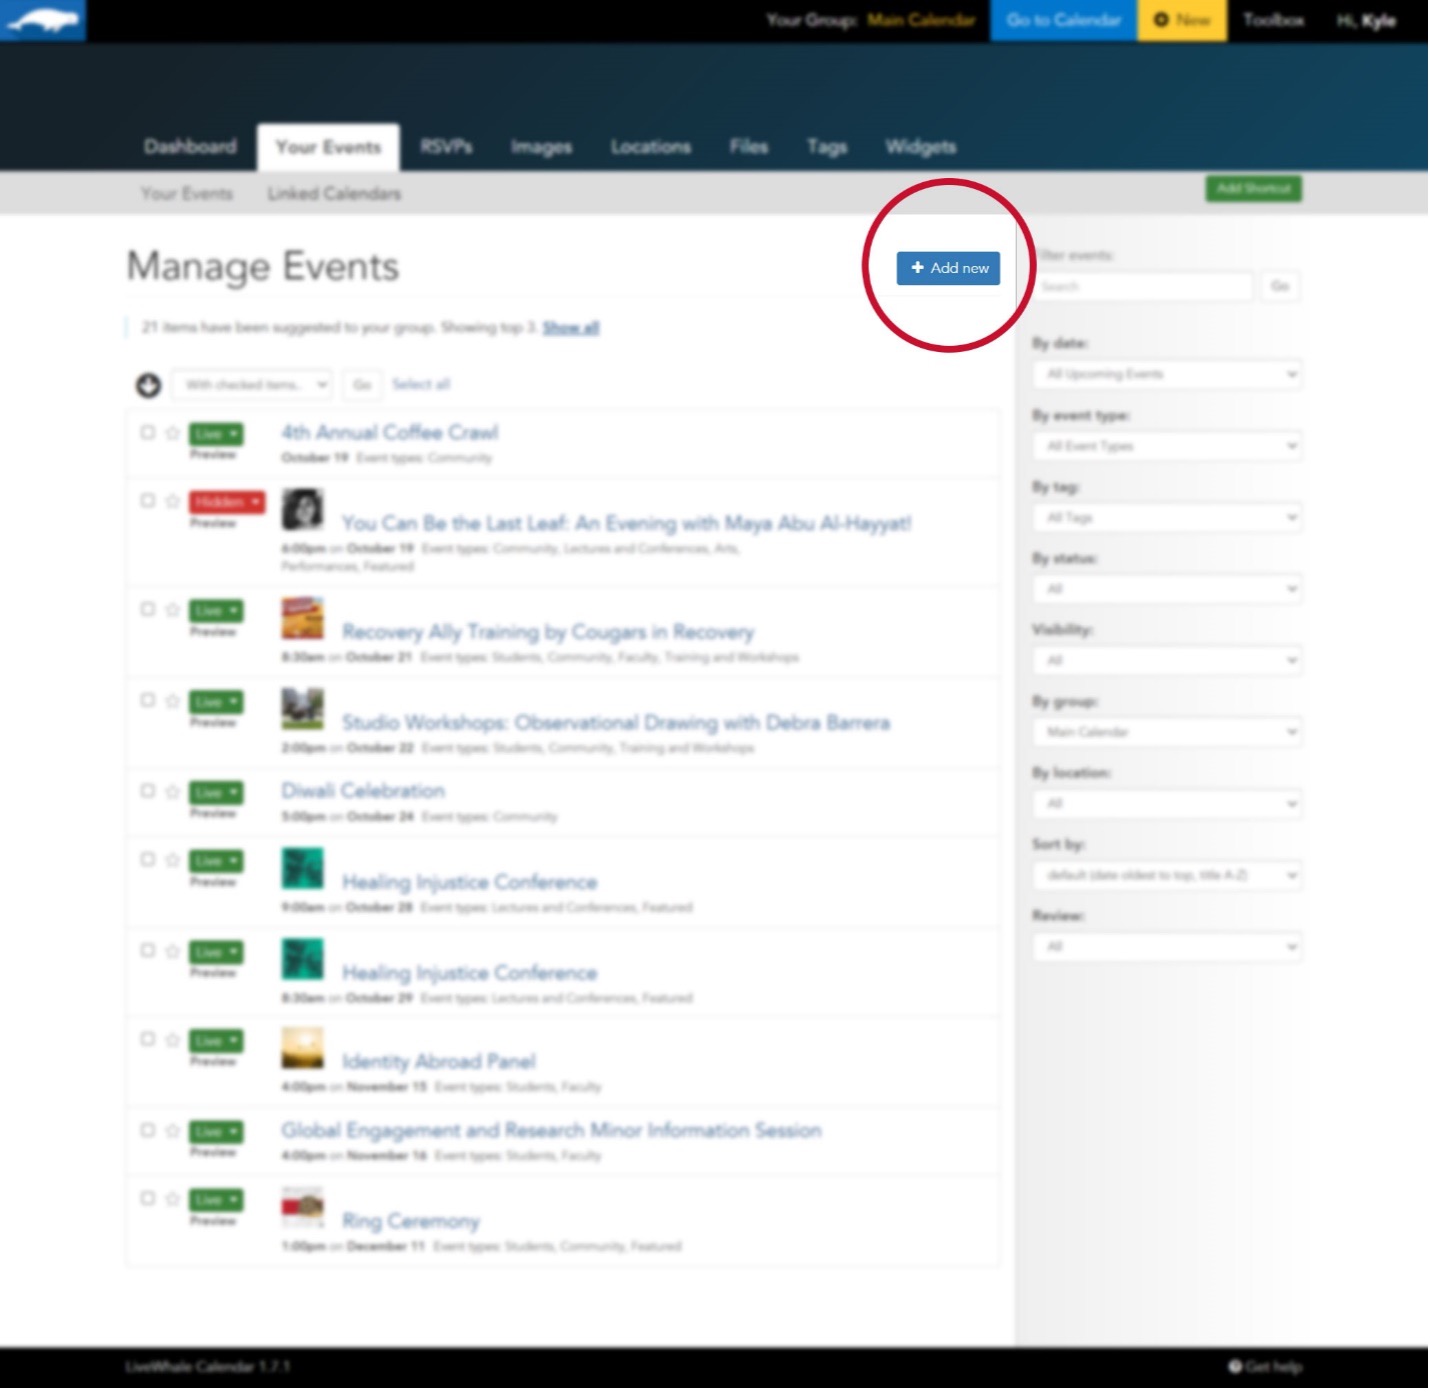
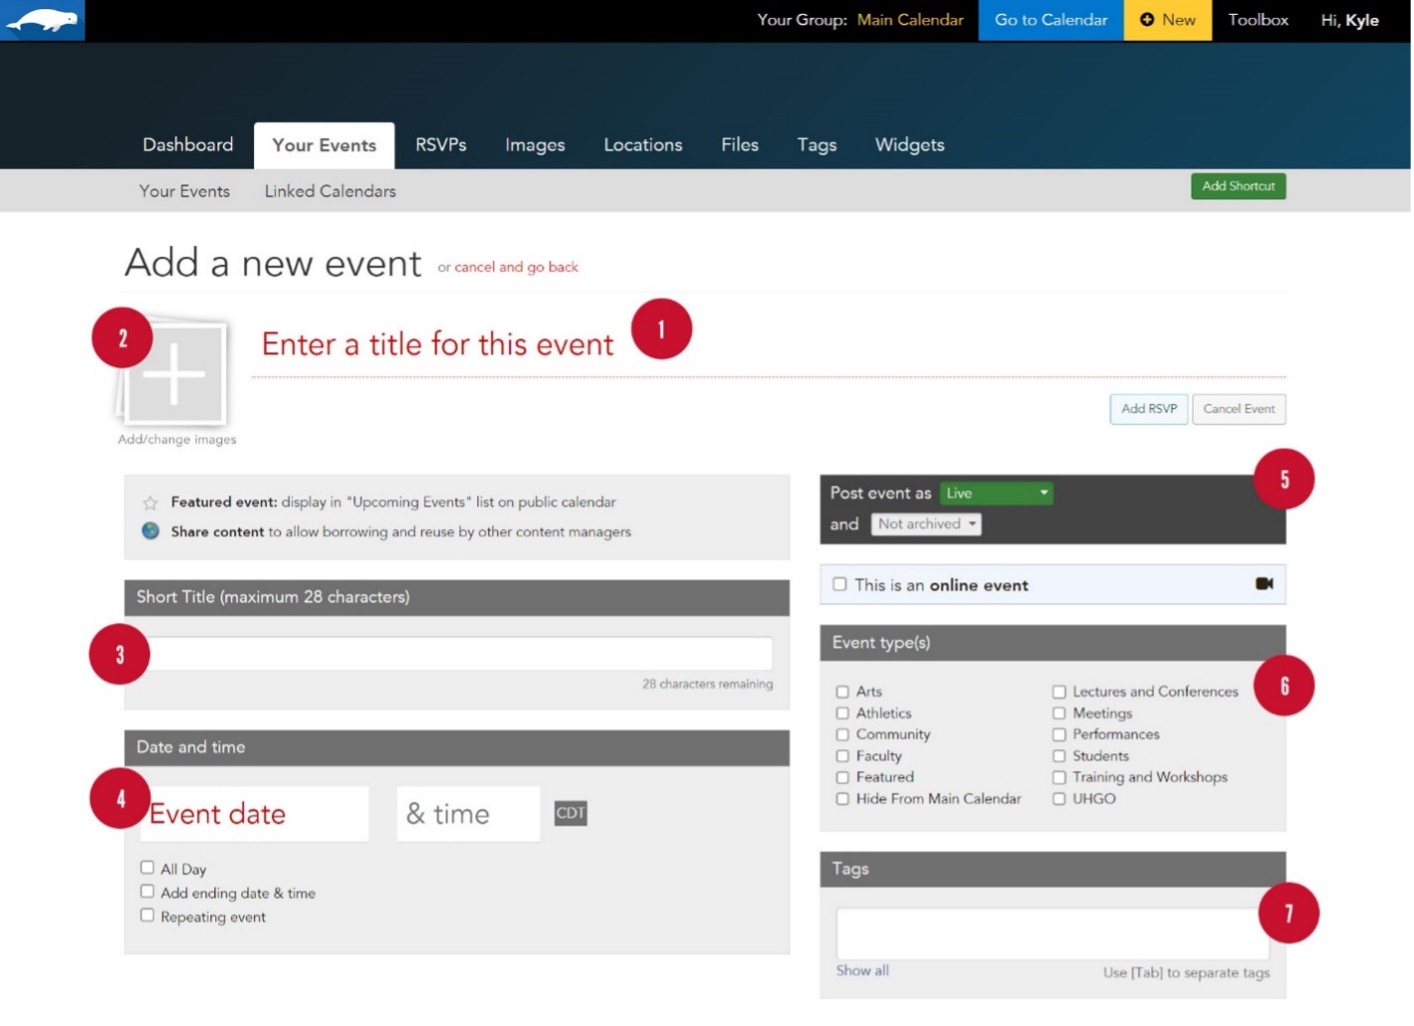
To add a new event, simply click on the “Add new” button on the right side.
Adding Event Details
Once you have clicked the “Add new” button, you will be directed to a new page to add information about the event.
- Event Title: To give your event a name, type in the field provided.
- Event Image: You can give your event an image by clicking add/change images. You can also drag and drop the image onto the icon.
- Short Title: Write a short title/summary within 28 characters. These titles are used for month-view calendars.
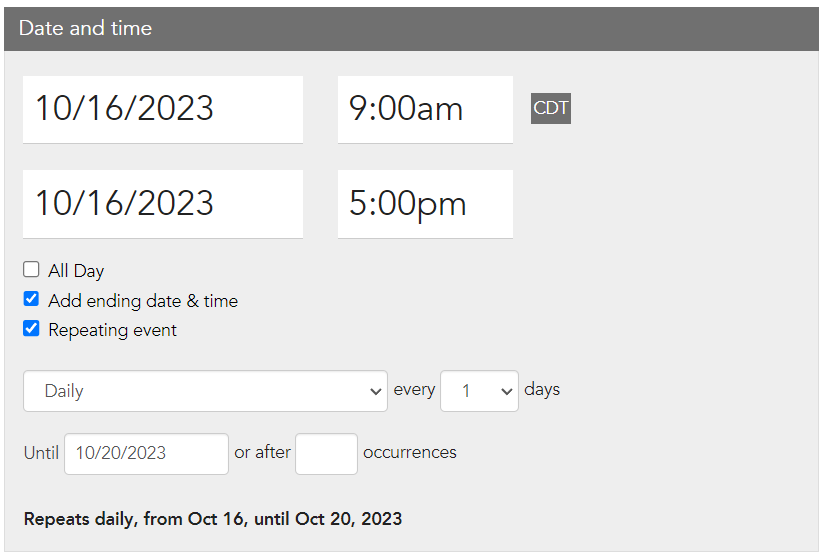
- Date and Time: To give your event a date and time, simply enter the required information in the
date and time fields.
- Recurring or Repeating Events: When creating a repeating event, the initial start/end date and time should be for
the first day of the event. All additional occurrences of the event should be handled
by checking "Repeating event".
- Recurring or Repeating Events: When creating a repeating event, the initial start/end date and time should be for
the first day of the event. All additional occurrences of the event should be handled
by checking "Repeating event".
- Posting an event as live will appear on the calendar whereas hidden will not display. You can have your event archived or not archived in the choices provided in the drop-down menu.
- Event Type(s): You can specify what type of event you are hosting by checking off the boxes that apply
- Tags: Adding tags helps users specify and narrow down an event. You can add any tags that relate to your event.
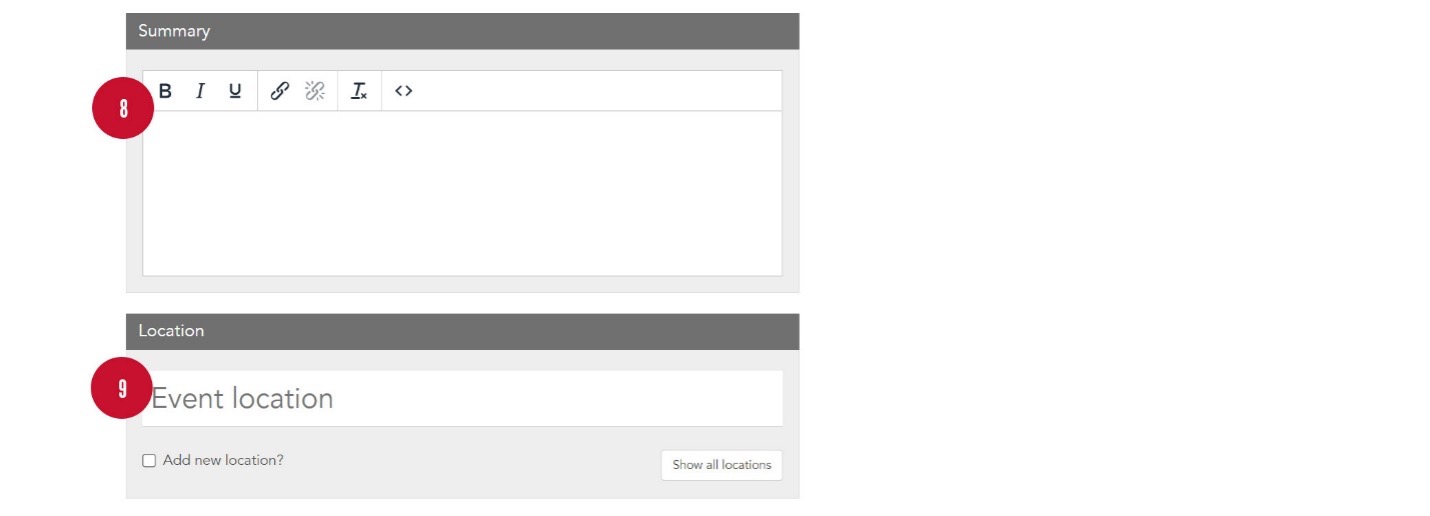
- Summary: Add a short summary of the event. Summaries appear below the image of your event when displayed in the carousel format.
- Location: Type in a location in the field provided to let people know where your event will take place. You can additionally add a new location or show all previous locations used in past events.
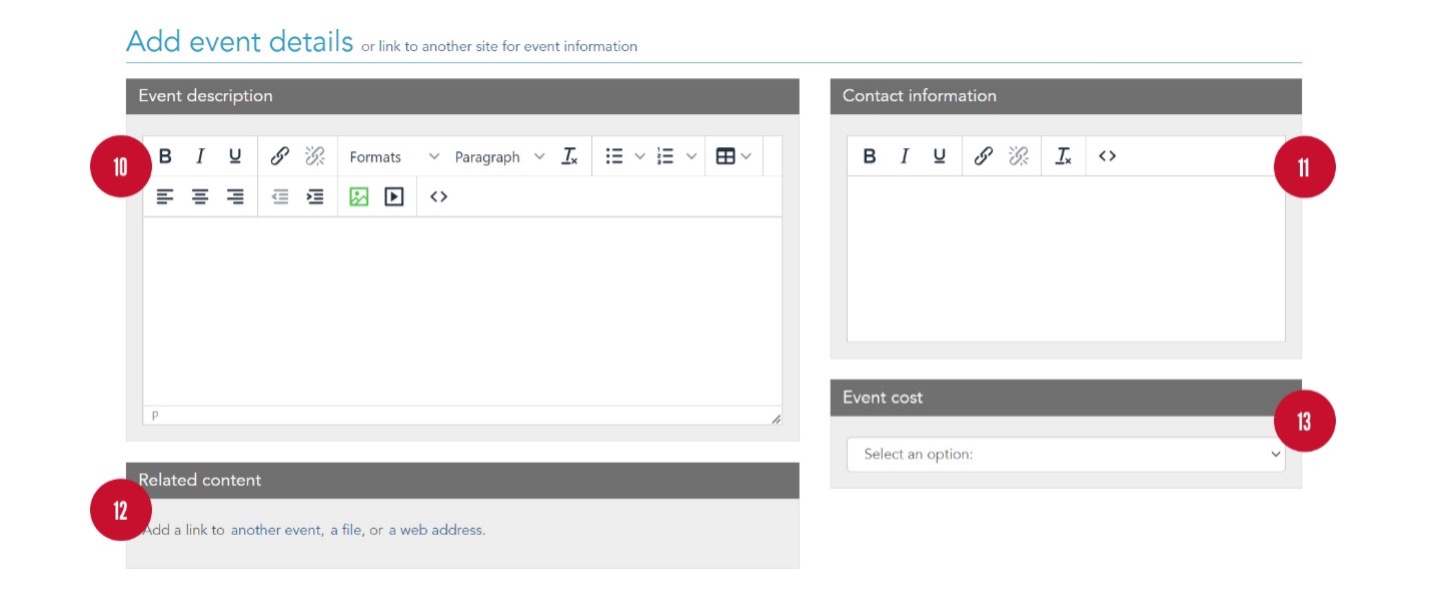
- Event description: This is where you should add all the details of your event. If you want to include additional photos or other media, you can do that here as well.
- Contact information: List name/number/email of someone that visitors can contact if they have questions about the event.
- Related content: If you need to attach any files or links, you may use this space to do so.
- Event cost: Select the cost of your event. It comes with choices such as free, event cost, suggested donation, and other.
Sharing and Privacy
- Suggestions: Suggest your event to different groups provided.
- Privacy options: Choose if you would like this event public or restricted to your calendar.

RSVP Details
RSVPs currently only display on the non-public calendar. We recommend utilizing a Microsoft Form to college RSVP information.