Teams Sites
Teams Sites is an essential collaboration tool for UH faculty and guests, offering a centralized space to work together on projects, share resources, and communicate efficiently. With Teams Sites, you can create dedicated spaces for departments, courses, research groups, or projects, providing easy access to files, discussions, and tasks. It's designed to help faculty and guests collaborate in real-time, stay organized, and manage content seamlessly. Whether you're working on a team project or organizing resources for a course, Teams Sites ensures that everything is in one place and accessible to all members.
To collaborate using a Microsoft Teams Site, follow the instructions below to:
Adding a Guest to a Teams Site
1. Open Microsoft Teams.
2. Go to the Teams Site where you want to add the guest.
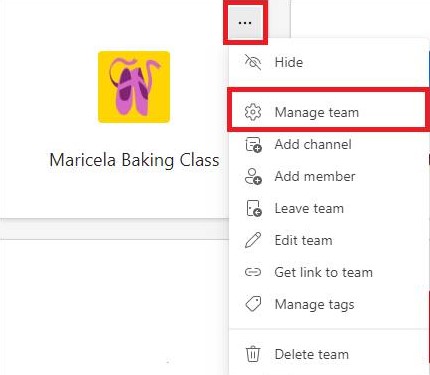
3. Click on the three dots ... next to the Team name.
4. Select Manage Team.
5. In the Members tab, click Add Member.

6. Type the guest email address in the Add members box. Ensure that the email address is correct and complete.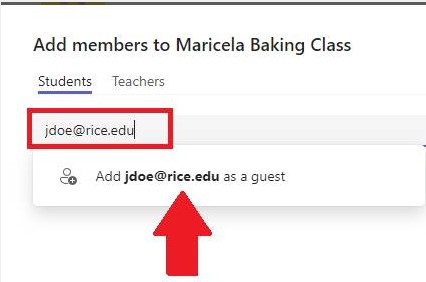
7. Click Add. 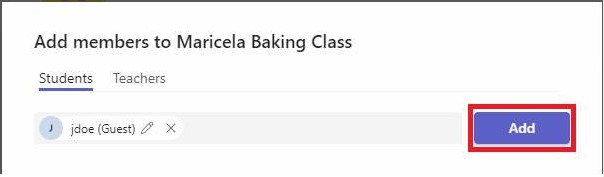
Note: Once the guest accepts the invitation, you will receive a notification that they have joined the Teams Site. You can also check the Members tab under Manage Team to confirm their status.
Allowing a Guest to See my Status
In order for a guest to see your status in Teams, make sure they have been added to
your Teams Site first. Once that has been done, have the guest:
1. Open Teams.
2. Look for your name in the search bar.
3. Select your name.
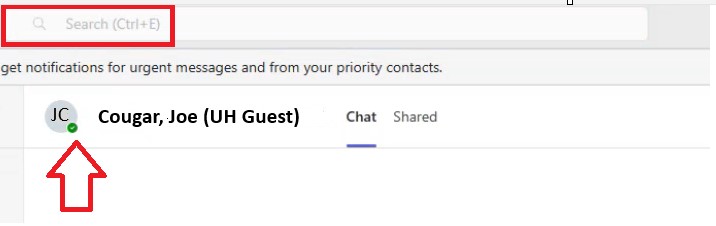
Note: The guest is able to see the presence status at the bottom of your initials.
Removing a Guest from a Teams Site
To remove a guest:
1. Go to Manage Team.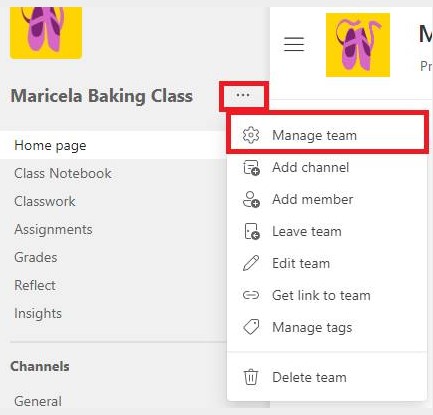
2. Select the Members tab.
3. Find the guest in the member list.
4. Click on the X next to their name to remove them from the Teams Site.
Note: The guest will no longer have access to the Teams Site or its content after removal.