Using Link Anchors - v7
Anchor IDs allow you to create a modified link which can direct a site visitor to a specific section of a webpage, allowing them to jump to the selected information quickly without having to search through the page for it. Anchor IDs can be useful either within the same page or between two separate pages.
The Anchor itself is a piece of code which is placed at a chosen location on a webpage. With an Anchor ID in place, links can then be modified to jump to that location directly.
Anchor Names (Named Anchors) were widely used in the past for the same purpose as Anchor IDs, and you might notice the CMS rewritting them automatically for you, as IDs.
Implementing Anchors
Implementing Anchor IDs involves two parts:
- Creating and inserting the anchor;
- Linking to the anchor from either the same page, or from another page.
You may need editing access to multiple pages in order to take advantage of Named Anchors. If you believe it would be useful to have an anchor placed within a page for which you do not have editing permissions, you would then need to make your request to the site's content owner. Please contact either webteam@uh.edu or webservices@uh.edu if you need further information on locating the appropriate content owners.
Creating and inserting the anchor
First, create the anchor at the point on the page you will want someone to jump to.
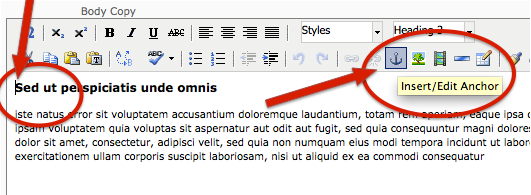
Within the WYSIWYG editor, place your cursor in front of the item you will want to jump to, then click the Anchor tool button on the toolbar:
This will open the Insert/Edit Anchor dialog:
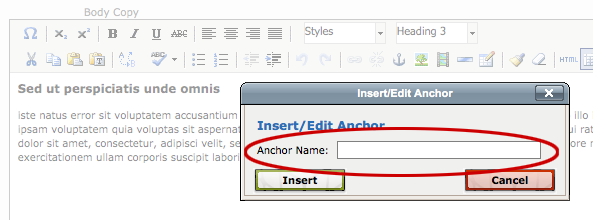
Enter the ID (name) you want for the Anchor. Anchor IDs should not contain spaces. You should consider Anchor names to be case-sensitive (capitalization matters).
When finished, click Insert.
A small icon will appear where the Anchor has been placed.
Note that in the page Preview, as with the final live page itself, the Anchor itself is not visible.![]()
Finally, Publish the page and the Anchor will be available for use.
Linking to the Anchor
After the Anchor ID is in place, you are then ready to create the link which will jump to that Anchor.
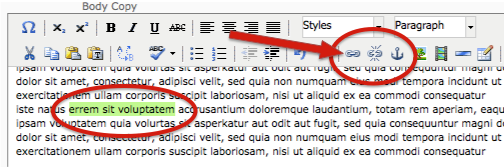
You will create a link in the usual way – e.g. by highlighting the desired text and then clicking on the WYSIWYG Editor's Link tool button:
When the Insert/Edit Link dialog appears, put the anchor's exact ID/name into the Anchor text field:
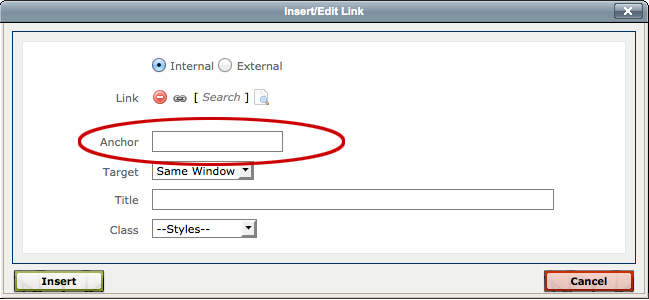
Remember that the anchor ID here must match exactly. Capitalization, spelling, etc. matters.
If you are doing a same-page jump, you shouldn't need to do anything else here. Click Insert, Submit the page to save your changes, and then the page should be ready to Publish out.
If you are linking to a Named Anchor from a different page
(than the one where the Named Anchor has originally been created and inserted):
Within the Edit panel of the 'remote' page you would insert your link as usual, using either the internal or external linking options, making sure the link points to the page which does hold the Named Anchor itself. You will still need to put the exactly-matching anchor ID into that link's Insert/Edit Link dialog. In this page-to-page jump scenario, you should also remember to include some descriptive text in the Title field of the Insert/Edit Link dialog, to help site visitors using text readers in identifying the link's destination. When ready, both pages would need to be Published out.