Frequently Asked Questions
MAPPING A NETWORK DRIVE
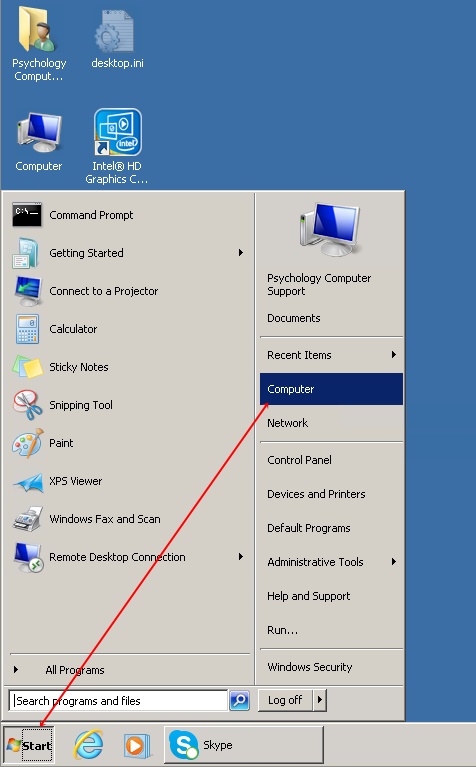
Click Start -> Computer
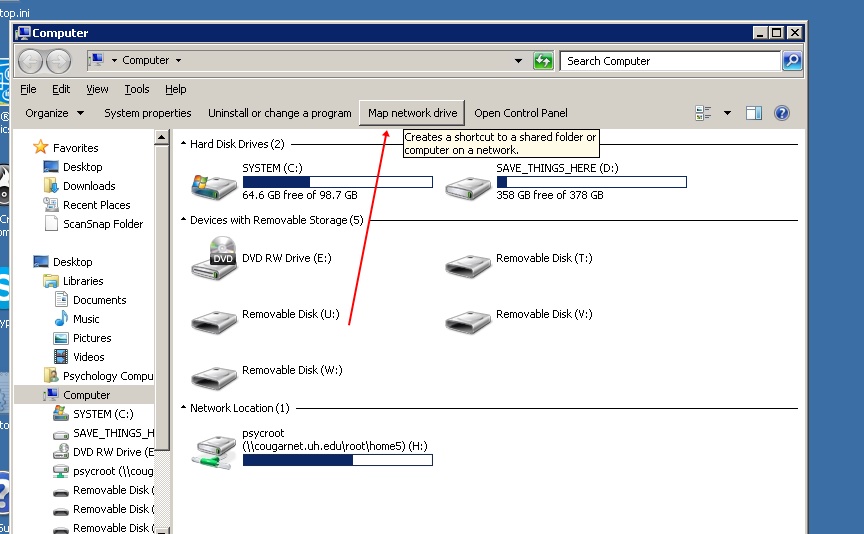
The Explorer window will open. Click "Map Network Drive" in the menu bar.
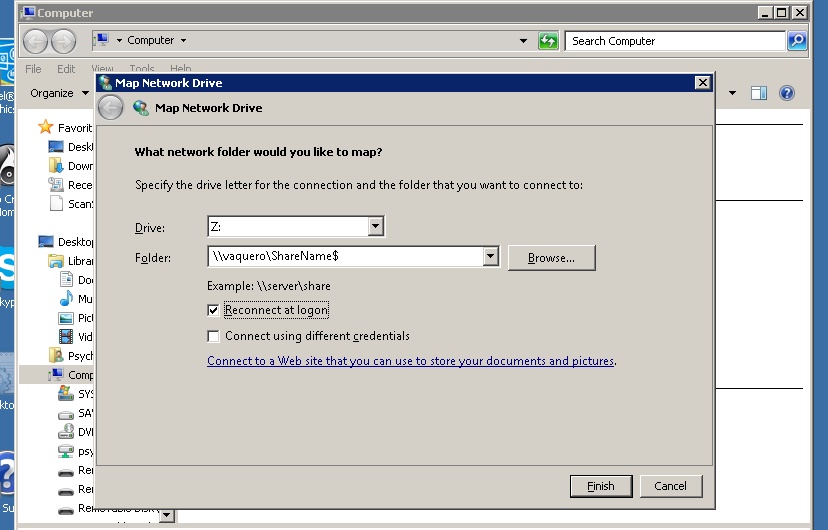
"Drive:" is the drive letter (as it would show in My Computer or Explorer), "Z" or "Y" for instance.
"Folder:" is the network shared folder. [\\<Computer Name>\<Share Name>]
Choose a drive letter and type in the path to the network share. Note that most of the lab shares are private and have a $ at the end of the folder name.
If you're on a campus computer and want the drive to persist every time you log on, check the "Reconnect at logon" box, then click "Finish", and you're done.
If you're using your personal computer, go to the next step.
If you are using your personal computer to map the network drive, you'll need to explicitly provide your Cougarnet username and password.
Click the box that says "Connect using different credentials" before clicking the "Finish" button
In the "Windows Security" window, type in cougarnet\ and your username (with no spaces) and your cougarnet password
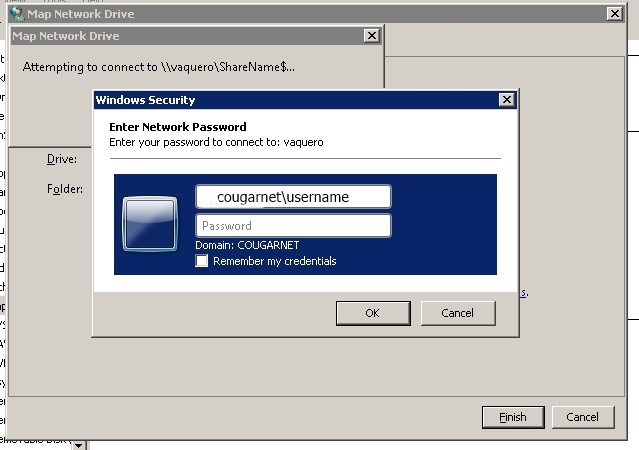
Click "OK"